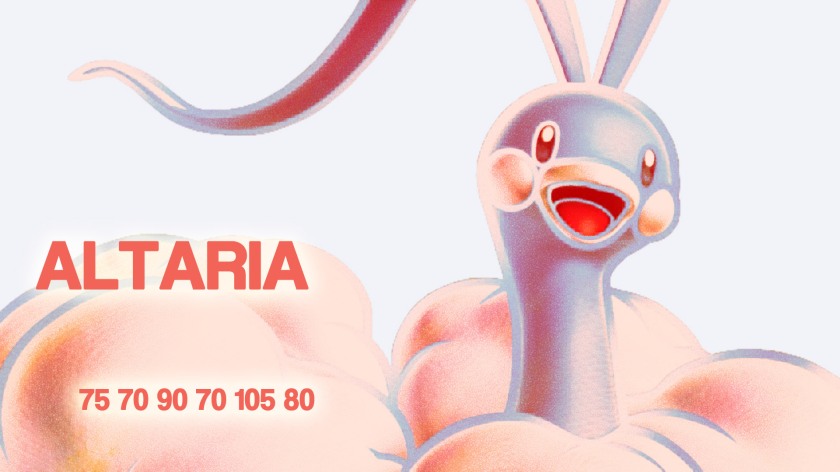
Euphoria – Altaria Analysis for Moon Series (VGC 2019)

Altaria MoonSeries.jpg


OVERVIEW


While not as dominant as it was in VGC 2016 until Ultra Series rolls into play, Weather as a mechanic is still a very important deciding factor throughout VGC 2019. Establishing the favorable Weather can either bolster the team’s damage output or filter the incoming damage. Because both Kyogre and Groudon don’t particularly fancy switching in on their archnemesis’ STAB moves, certain players have looked towards packing a Pokemon that can negate the Weather effects with its Ability.

The most popular candidate for this role has been Rayquaza with its Air Lock, though the Sky High Pokemon being a Restricted Legendary counts against it. This is mainly because it is unable to use Dragon Ascent, its best STAB move, until Ultra Series. As such, alternatives have to be considered. This is where Altaria enters the picture. In terms of Type combination, it is the closest substitute to Rayquaza. However, the disparity in Base Stat becomes very obvious when facing against the other Restricted Legendary Pokemon in the format.

As such, despite providing a valuable asset, there aren’t enough incentives to make Altaria a consistent force in VGC 2019. Players will have to find a way to fully exploit the niche techs that Altaria provides to justify its inclusion on the team. In this article, we shall look at how to construct an Altaria set for the Moon Series metagame. We will first explore its move combinations, followed by Hold Item choice, and finally, useful EV Benchmarks to wrap up the process.


MOVES


Slot 1

As with the other Dragon and Flying Type Pokemon released in the same Generation, Altaria suffers from a lack of access to proper Flying Type STAB moves, though viable Flying Type STAB itself hasn’t been plentiful to begin with.

Excluding Sky Attack, the only options that Altaria gets are Aerial Ace and Pluck, both only of 60 Base Power. Pluck does have a rather interesting niche, being the Flying Type variant of Bug Bite. This allows Altaria to steal the Pinch Berry on bulky foes like Incineroar, which is instrumental at making sure every hit on such adversaries deal lasting damage.

Moon Series has brought some respite with Z Crystal to help turn Sky Attack into a powerful Supersonic Skystrike, though it isn’t the best idea to award Altaria with the Z Crystal considering its lacklustre Base Attack and Speed.


Slot 2

The influence of Fairy Type Pokemon on the metagame has dampened the allure of most Dragon Type STAB options. Likewise, Altaria is better off running a coverage move to better cover threats that it could not otherwise with its Flying Type STAB. Candidates for this slot would include Flamethrower or Heat Wave, which are now ubiquitous with the elimination of Kartana; or Ice Beam for Groudon and/or opposing Dragon and/or Fairy Type Pokemon. A nifty alternative would be Mirror Move, though the lack of Speed Boost like Blaziken makes any strategy involving Z Mirror Move less devastating from the get-go.


Slot 3

The third slot would be reserved for a supportive move, whether it be to support Altaria itself or the team as a whole. For the former, it would usually be in the form of Dragon Dance, which serves as a way to negate the effects of Intimidate. The other option would be Tailwind, which serves as a form of Speed control for the team.


Slot 4

This slot is usually left for Protect, to help the Humming Pokemon bide a turn. This puts Altaria in a better position against Ludicolo, since Cloud Nine nullifies any Speed advantage that Ludicolo would want to net with Swift Swim, and Protect ensures that Altaria gets a clear shot against the Carefree Pokemon.


HOLD ITEM


Altaria is better off playing a secondary support role in VGC 2019. This means that it is unfortunately rather low in the pecking order for Hold Item selection. That said, there is still enough variety in the choices that the Humming Pokemon can call upon. Three possible options will be showcased here, namely: Yache Berry, Terrain Seed, and Flyinium Z.


Yache Berry / Safety Goggles


Altaria @ Yache Berry / Safety Goggles
Ability: Cloud Nine
Level: 50
– Flamethrower / Ice Beam
– Pluck
– Protect
– Tailwind


Yache Berry allows Altaria to take an Ice Beam more comfortably so that it can continue providing Cloud Nine support for the team after setting up Tailwind or landing a cheeky hit with its Flying Type STAB. This allows the Humming Pokemon to perform better against the Ludicolo + Kyogre combination. For a slightly better matchup against Groudon + Venusaur, Safety Goggles can be considered instead to ward off any unwanted Sleep Powder. In the latter scenario, players can run Adamant Nature for more damage on Pluck, since that is the only move boosted by STAB.


Terrain Seed


Altaria @ Misty Seed
Ability: Cloud Nine
Level: 50
Jolly Nature
– Dragon Dance
– Heat Wave / Mirror Move
– Pluck
– Protect


Terrain Seed gives Altaria the bulk necessary to set up a Dragon Dance (or two) so that it can actually deal damage to foes. Pluck remains as its main form of damage output, with Heat Wave (or Flamethrower) serving as a makeshift measure against Steel Type foes, most notably Kartana. A tech that players could run with this particular Altaria variant would be Mirror Move alongside an allied Groudon, allowing the team to quickly fire off two Precipice Blades in rapid succession.


Flyinium Z


Altaria @ Flyinium Z
Ability: Cloud Nine
Level: 50
Jolly Nature
– Mirror Move / Dragon Dance
– Sky Attack / Pluck
– Protect
– Tailwind


Flyinium Z, while somewhat wasteful on a Pokemon like Altaria, is one of the most consistent ways to make up for the Humming Pokemon’s lacklustre Base Attack. This allows Altaria to bypass the charging turn and imperfect accuracy of Sky Attack to land the immediate KO on foes like Ludicolo and Venusaur. A more consistent measure would be to run Pluck instead for usage without the Z Crystal, and relying on Supersonic Skystrike itself for the power boost necessary to land an OHKO.

Flyinium Z also synergizes with Mirror Move to give Altaria a nifty +2 to its Base Attack, which the Humming Pokemon greatly appreciates, especially with Intimidate an omnipresent force in the metagame. If that is not an appealing option, players can run Dragon Dance instead in a shoddy attempt to emulate a typical Gyarados setup from VGC 2017.

There isn’t too much value to be gained out of running Z Tailwind on Altaria, but it remains an instrumental form of Speed control that Altaria, along with the team, can benefit from.


EV BENCHMARKS


Speed

180 EVs -> Outspeed Modest Ludicolo by 1
252 EVs -> Speed Tie Modest Venusaur by 1
164+ EVs -> Outspeed Modest Venusaur by 1
172+ EVs -> Outspeed Timid/Jolly Tapu Koko by one after 1x Dragon Dance
236+ EVs -> Outspeed Modest Kyogre by 1


Defense

252+ SpA Kyogre Water Spout (150 BP) vs. 0 HP / 0 SpD Altaria: 56-66 (37.3 – 44%) — guaranteed 3HKO


252+ SpA Fairy Aura Xerneas Moonblast vs. +1 68 HP / 148 SpD Altaria: 134-158 (84.2 – 99.3%) — guaranteed 2HKO
252+ SpA Kyogre Ice Beam vs. +1 116 HP / 172 SpD Altaria: 136-164 (82.4 – 99.3%) — guaranteed 2HKO


Offense

+1 252+ Atk Altaria Pluck vs. 4 HP / 0 Def Ludicolo: 152-180 (97.4 – 115.3%) — 87.5% chance to OHKO
+1 252+ Atk Altaria Pluck vs. 4 HP / 0 Def Venusaur: 134-158 (85.8 – 101.2%) — 12.5% chance to OHKO


100 Atk Altaria Supersonic Skystrike (120 BP) vs. 4 HP / 0 Def Ludicolo: 156-186 (100 – 119.2%) — guaranteed OHKO
220 Atk Altaria Supersonic Skystrike (120 BP) vs. 4 HP / 0 Def Venusaur: 156-186 (100 – 119.2%) — guaranteed OHKO


0- SpA Altaria Flamethrower vs. 68 HP / 252 SpD Assault Vest Kartana: 88-108 (61.5 – 75.5%) — guaranteed 2HKO


COUNTERS AND CHECKS


Xerneas


Xerneas can steamroll through Altaria easily with STAB Moonblast, and there isn’t much that Altaria can do in retaliation, beside a lucky Haze to eliminate nullify Geomancy. Players can also make use of Perish Song to force Xerneas out through careful usage of Protect and redirection, but that strategy itself is too passive to be consistent as a countermeasure to the Life Pokemon.


Incineroar


With Altaria’s best STAB options on the Physical spectrum until it gains access to Mega Evolution, the Humming Pokemon is easily neutered by Intimidate. Outside of Pluck to eliminate Incineroar’s Pinch Berry, there isn’t much that Altaria can do to significantly hurt the Heel Pokemon. This leads to a stalemate that Altaria is ill afforded to manage considering its role as a secondary support.


Tapu Koko


Tapu Koko takes Altaria’s STAB options with ease, and can retaliate with a super effective STAB Dazzling Gleam to quickly remove the Humming Pokemon from the equation. Altaria’s Cloud Nine also doesn’t hinder Tapu Koko unless Thunder is involved. Yet, with Electrium Z sets making a comeback, Altaria’s presence against Tapu Koko serves or as a hindrance to the player than the opponent.


TEAMMATES


Kyogre


The main reason for Altaria’s inclusion in a VGC 2019 team would be to nullify the effects of an undesirable Weather, which largely corresponds to the activation of Drought for an allied Kyogre. By introducing Cloud Nine, opponents can no longer expect their Groudon to switch in comfortably on a Water Spout, no matter how bulky they have trained their Continent Pokemon to be.


Landorus Therian


Landorus Therian serves as the second best Ground Type Pokemon out there in VGC 2019, and is featured over Groudon in this segment simply because Altaria’s Cloud Nine doesn’t interfere with the Abundance Pokemon in the same way it negates Groudon’s Drought. While it is still weak to a Water Type move from Kyogre, Landorus Therian is arguably better equipped to deal with popular threats thanks to its Base Speed of 91. STAB Earth Power covers just about everything that resists Altaria’s Flying Type STAB. Through its own Intimidate, it can cover opposing Physical attackers more efficiently than Groudon could. Players will have to take note of the fact that both Altaria and Landorus Therian are highly vulnerable to Ice Type moves when planning their team, however.


Solgaleo


Solgaleo serves as one of the primary methods that players can rely on to eliminate the threat that is Xerneas. Thanks to Full Metal Body, it can shrug off Intimidate and land the OHKO on Incineroar with Superpower (with help from Life Orb). In return, Altaria’s Cloud Nine helps to reduce the damage that it would otherwise take from Kyogre, which greatly improves its survival odds against the Sea Basin Pokemon.


Assembly – Stakataka Analysis for Moon Series (VGC 2019)

stakataka moonseries


OVERVIEW


Stakataka has quickly become one of the best Trick Room setters in VGC, owing to its extremely low Base Speed of 13 and abundances of Type resistances. In VGC 2019, its status as a Steel Type Pokemon has seen it replace Bronzong’s role from VGC 2016, considering how much better it is at dealing with Xerneas and Incineroar. In this article, we shall look at how to construct a Stakataka set for the Moon Series metagame. We will first explore its move combinations, followed by Hold Item choice, and finally, useful EV Benchmarks to wrap up the process.


MOVES


Slot 1

This slot goes to Trick Room, the biggest reason behind why Stakataka would even be picked in a metagame rife with Kyogre and Groudon. It remains as one of the best answers to both Xerneas and Tailwind centric teams.

Slot 2

The second slot is taken up by Gyro Ball, the other claim to fame for Stakataka, owing to its effectiveness against Xerneas, especially post Geomancy. It is also great at dealing with the other dominant Fairy Type Pokemon in the metagame, like the Alolan Guardians.

Slot 3

The third slot is the slot that players get the most flexibility out of. There are two main ways to consider, coverage or support.

In terms of coverage, the most popular option would be Rock Slide, which helps to hit Incineroar and Flying Type targets like Yveltal. When under Trick Room, Stakataka’s Speed advantage gives players the chance to abuse flinch shenanigans, which is usually a much-appreciated equipment in one’s toolbelt. This also allows Stakataka to make use of Rockium Z more efficiently to cover the likes of Yveltal and Incineroar.

On the supportive end, players can choose between Wide Guard, Ally Switch, or Skill Swap. Wide Guard is immensely useful at warding off Water Spout and Precipice Blades from Kyogre and Groudon respectively, which helps greatly in nullifying the offensive pressure exerted by the duo. Ally Switch, on the other hand, can be used to divert a move that would otherwise KO Stakataka’s partner away, for example, Leaf Blade onto an allied Kyogre. Lastly, Skill Swap is a rather niche pick that can either aid players in managing the Weather War, pass Beast Boost onto a more fearsome ally, reset Terrain, or reflect Intimidate.

Slot 4

The final slot is usually given to Protect, which helps Stakataka bide a turn. This is especially important as Stakataka’s status as a Trick Room setter can lead to opponents doubling into the Ultra Beast to prevent Trick Room from going up. Without Focus Sash or defensive mechanisms against Fake Out, Stakataka might end up being fodder unnecessarily early and ruin the player’s game plan. This is also the slot to drop for Wide Guard, if players deem spread moves to be the dominant team breaker during the teambuilding process, and don’t wish to lose Rock Slide coverage.


HOLD ITEM


There are a few Hold Items that players can consider slapping on UB: Assembly to help it better function in its role as a Trick Room setter cum abuser. The sole candidate featured here is a Z Crystal, with other candidates featured in the previously released analysis article for Sun Series, located here.


Rockium Z


Stakataka @ Rockium Z
Ability: Beast Boost
Level: 50
Brave Nature / Lonely Nature
IVs: 0 Spe
– Gyro Ball
– Protect / Wide Guard
– Rock Slide
– Trick Room


Rockium Z provides Stakataka with the power boost it desperately needs to chunk, if not outright OHKO Incineroar through Intimidate, by turning Rock Slide (or Stone Edge) into a powerful Continental Crush. It also has the added bonus of being able to OHKO Yveltal, making it a somewhat decent answer to the Destruction Pokemon. The other specifics of the set are otherwise self-explanatory.


EV BENCHMARKS


Speed

NONE


Defense

252 Atk Kartana Sacred Sword vs. 228 HP / 0 Def Stakataka: 136-164 (82.4 – 99.3%) — guaranteed 2HKO
252+ Atk Choice Band Groudon Precipice Blades vs. 228 HP / 76 Def Shuca Berry Stakataka: 138-164 (83.6 – 99.3%) — guaranteed 2HKO
252 SpA Choice Specs Lunala Moongeist Beam vs. 164 HP / 0 SpD Stakataka: 132-156 (84 – 99.3%) — guaranteed 2HKO
252+ SpA Kyogre Water Spout (150 BP) vs. 220 HP / 244 SpD Passho Berry Stakataka in Rain: 138-163 (84.1 – 99.3%) — guaranteed 2HKO
+2 252+ SpA Fairy Aura Xerneas Moonblast vs. 228 HP / 0 SpD Stakataka: 118-139 (71.5 – 84.2%) — guaranteed 2HKO


Offense

-1 0+ Atk Stakataka Gyro Ball (150 BP) vs. 164 HP / 92 Def Tapu Lele: 174-206 (104.8 – 124%) — guaranteed OHKO
252+ Atk Stakataka Rock Slide vs. 252 HP / 4 Def Ho-Oh: 232-276 (108.9 – 129.5%) — guaranteed OHKO
252+ Atk Stakataka Gyro Ball (150 BP) vs. 252 HP / 252 Def Xerneas: 234-276 (100.4 – 118.4%) — guaranteed OHKO
252+ Atk Stakataka Rock Slide vs. 0 HP / 0 Def Tornadus: 140-168 (90.9 – 109%) — 50% chance to OHKO


252+ Atk Stakataka Continental Crush (140 BP) vs. 252 HP / 0 Def Yveltal: 276-326 (118.4 – 139.9%) — guaranteed OHKO
-1 252+ Atk Stakataka Continental Crush (140 BP) vs. 4 HP / 0 Def Reshiram: 176-210 (100 – 119.3%) — guaranteed OHKO
-1 252+ Atk Stakataka Continental Crush (140 BP) vs. 4 HP / 0 Def Kyurem-W: 194-230 (96.5 – 114.4%) — 75% chance to OHKO
-1 252+ Atk Stakataka Continental Crush (140 BP) vs. 236 HP / 4 Def Incineroar: 192-228 (96 – 114%) — 75% chance to OHKO

Ā 

COUNTERS AND CHECKS


Kyogre


It takes way too much EVs for Stakataka to survive a Rain boosted Water Spout, though players can nullify that through Wide Guard. Yet, with more players running Scald on Kyogre, it becomes a lot harder for Stakataka to stand up against the Sea Basin Pokemon without team support. To make matters worse, Kyogre resists Stakataka’s Gyro Ball, causing UB: Assembly to be heavily reliant on its teammates to eliminate the Restricted Legendary. With the release of Z Crystals, Stakataka is no longer assured of survival through Wide Guard, since Hydro Vortex is single target regardless of the base move.


Groudon


Like Kyogre, Groudon is equipped with both single target and double target STAB moves that strike Stakataka for super effective damage: Stomping Tantrum and Precipice Blades respectively. While Stakataka’s high Base Defense allows it to take a hit better, it is not able to take a Tectonic Rage from Groudon, even if the damage is filtered by Intimidate.


Kartana


As a fellow Steel Type Pokemon, Kartana is resistant to the majority of Stakataka’s arsenal. Yet, it can deal a comfortable 2HKO thanks to Sacred Sword. Stakataka does not actually resist Kartana’s most common moves either, so it can only rely on its high Base Defense to take a hit from the Drawn Sword Pokemon.


TEAMMATES


Ludicolo


Ludicolo’s main asset as an ally to Stakataka lies in its effectiveness against both Kyogre and Groudon, thanks to STAB Grass Knot, Swift Swim, and resistance to both Restricted Legendaries’ STAB options. Being faster than Incineroar also means that Ludicolo can outrun the Heel Pokemon, and can threaten the latter with a super effective STAB Hydro Pump. Come Moon Series, the return of Z Crystals would make Ludicolo an even better answer to Incineroar, thanks to Hydro Vortex.


Groudon


Groudon greatly appreciates Wide Guard support from Stakataka, especially when facing the likes of Scald-less Kyogre, or opposing Groudon. As a Trick Room setter, players can run slower and bulkier Groudon with Stakataka on the team. Groudon is also a rather reliable way to deal with opposing Solgaleo, a foe that Stakataka struggles to dent. If Wide Guard is not chosen, even Ally Switch and Skill Swap can help to bring Groudon out of harm’s way or reassert Weather control respectively.


Yveltal


Yveltal is immune to Ground Type moves and can punish Fighting Type foes like Hitmontop with STAB Oblivion Wing. Due to Kartana’s low Special Defense, Oblivion Wing can also serve as a makeshift answer to the Drawn Sword Pokemon.

With Sucker Punch, the Destruction Pokemon can quickly limit the effectiveness of a Water Spout from Kyogre. Otherwise, players can run Snarl on Yveltal to help bolster UB: Assembly’s relatively weaker Special Defense. Its Dark Type STAB is also very much appreciated for its effectiveness against the Light Trio, especially Solgaleo.

In return, Stakataka helps Yveltal better manage the biggest threat to its dominance, Xerneas, by landing the clean OHKO after the Life Pokemon sets up Geomancy. Opponents aren’t likely to lead with their Xerneas against a potential KO from Gyro Ball, which makes life much easier for the Destruction Pokemon.

Blaze Out – Blaziken Analysis for Moon Series (VGC 2019)

blaziken moonseries


***This article is meant for usage in Moon Series. For the latest article on this particular Pokemon, please click here.***


OVERVIEW


Blaziken’s role has largely stayed the same throughout VGC history, with its high Base Attack and Special Attack putting it in good stead as one of the team’s Main Forces. Its STAB combination is also very useful at punching through a variety of foes popular in VGC 2019. The icing on the cake lies in its Hidden Ability, Speed Boost, which allows the Blaze Pokemon to outspeed almost everything out of Trick Room after two turns. Moon Series’ format returns Z Crystals to the metagame, a development that Blaziken greatly appreciates. This is because it allows Blaziken to match the damage output exerted by the dominating Restricted Legendaries. This article will explore the ways one could go about building a Blaziken set for Moon Series. This will be done through analyzing its best moves, Hold Item compatibility, and EV benchmarks to make Blaziken more efficient at its job.


MOVES


Slot 1

Protect serves as the most important move on any Blaziken set, mainly because it is one of the safest guarantees to ensure that the Blaze Pokemon gets a Speed Boost under its belt for the next turn. This, of course, is also useful for either warding off Fake Out or scouting for any powerful moves the opponent has reserved. Finally, Protect allows Blaziken to bide out unfavorable field conditions for one turn if absolutely necessary.


Slot 2

Blaziken’s primary STAB option is a rather straightforward one, with the most popular option in Flare Blitz flanked by a few niche picks. Blaze Kick and Fire Punch serve as less powerful alternatives that don’t carry recoil, while Flame Charge can quickly stack up Speed increments when used in tandem with Speed Boost. However, none of these three Physical options are as consistent as Flare Blitz.

On the Special side of the spectrum, there is the ever standard Flamethrower, Heat Wave for spread damage in anticipation of Ally Switch, or Flame Burst, which, while weak, can offer some form of almost unavoidable splash damage on the other foe. That is a mechanic players can exploit to either burn Focus Sash or break Shadow Shield.

Players could also look towards Overheat, the most powerful Special Fire Type move that Blaziken can learn (barring Z Crystals). While it comes with a nasty drawback of lowering Blaziken’s Special Attack by 2, it doesn’t subject Blaziken to unnecessary recoil. Most of the targets that Blaziken do want to hit with its Fire Type STAB are weaker in their Special Defense anyway, so players can consider running Overheat for better overall efficiency. The one actual drawback would be Overheat’s imperfect accuracy, so players will have to watch out for that.

Slot 3

Low Kick has returned with a vengeance in a metagame infested with heavy Restricted Legendaries, though Game Freak has seen fit to introduce a bunch of lightweight stalwarts like the Alolan Guardians and Kartana to mess up the damage mechanics. As a result, players are recommended to consider Hi Jump Kick, Blaziken’s strongest alternative. It does come with a nasty side effect of crash damage on an ineffective hit (miss, hit into Protect, or hit into immunity), though players could work around that by utilizing a Z Crystal.


Slot 4

The final move is the most flexible one, with multiple moves that players can choose from to cover different threats. Rock Slide helps out against Ho-Oh and other Flying Type foes, as well as usage in tandem with Speed Boost to fish for flinches. Poison Jab, when powered up by Life Orb, can be used to deal with OHKO 4 HP Tapu Koko (87.5%) and Tapu Lele, or 2HKO Xerneas. Night Slash helps against Lunala, while Mirror Move can be used to reflect certain powerful moves like Spacial Rend and Moongeist Beam.


HOLD ITEM


Blaziken mightly only be able to play one role, but it is very good at what it does, so players should make use of its Hold Item slot wisely to help optimize the Blaze Pokemon’s performances.


Life Orb / Fightinium Z / Flyinium Z


Blaziken @ Life Orb / Fightinium Z / Flyinium Z
Ability: Speed Boost
Level: 50
EVs: 252 Atk / 4 SpA / 252 Spe
Naughty Nature / Adamant Nature
– Hi Jump Kick / Low Kick
– Overheat / Flare Blitz
– Poison Jab / Mirror Move / Rock Slide
– Protect


While Focus Sash is a semi-reliable way to get Blaziken two Speed Boosts under its belt, Life Orb is still the preferred option if players aren’t running the Z Crystal, since it is more ideal to have the Blaze Pokemon act as a glass cannon, clean up the field so that the team’s powerhouses can come in and dominate unopposed.

The first Z Crystal to consider would be Fightinium Z, which turns Hi Jump Kick into a devastating All Out Pummeling that can OHKO Kyogre, Incineroar, and Yveltal (the latter after some prior chip damage). However, considering the sheer amount of Fairy Type Pokemon in the metagame, players will need to justify using Fightinium Z on Blaziken instead of dedicating another Z Crystal to a more powerful Pokemon like Groudon.

The other Z Crystal that players can consider would be Flyinium Z, as part of a strategy that has been covered everytime an analysis of Blaziken has been done on this site. Mirror Move allows Blaziken to copy the opponent’s (or Blaziken’s ally’s) move. Players can exploit this mechanic with Speed Boost to quickly stack two powerful Water Spout and/or Precipice Blades in succession. Returning Precipice Blades against Groudon isn’t as useful now as Groudon is yet to be able to undergo Primal Reversion, however. Flyinium Z turns the copied move into its corresponding Z Move and gives Blaziken a nifty +2 to its Attack, which turns the Blaziken into a potent force when combined with Speed Boost.


EV BENCHMARKS


Speed

188 EVsĀ  -> Outspeed Timid Whimsicott after 1x Speed Boost
172+ EVs -> Outspeed Timid/Jolly Tapu Koko after 1x Speed Boost
236+ EVs -> Outspeed Modest Choice Scarf Kyogre after 1x Speed Boost


Defense

252 SpA Tapu Koko Thunderbolt vs. 0 HP / 0 SpD Blaziken in Electric Terrain: 126-148 (81.2 – 95.4%) — guaranteed 2HKO


Offense

252 Atk Blaziken High Jump Kick vs. 252 HP / 0 Def Stakataka: 220-264 (130.9 – 157.1%) — guaranteed OHKO
252 Atk Blaziken Flare Blitz vs. 236 HP / 76 Def Amoonguss: 234-276 (106.8 – 126%) — guaranteed OHKO


252 Atk Life Orb Blaziken High Jump Kick vs. 4 HP / 0 Def Ludicolo: 183-216 (117.3 – 138.4%) — guaranteed OHKO
252 Atk Life Orb Blaziken Flare Blitz vs. 4 HP / 0 Def Ludicolo: 168-199 (107.6 – 127.5%) — guaranteed OHKO
252 Atk Life Orb Blaziken Flare Blitz vs. 252 HP / 0 Def Solgaleo: 242-283 (99.1 – 115.9%) — 87.5% chance to OHKO
-1 252 Atk Life Orb Blaziken High Jump Kick vs. 236 HP / 4 Def Incineroar: 198-234 (99 – 117%) — 87.5% chance to OHKO
252 Atk Life Orb Blaziken Poison Jab vs. 4 HP / 0 Def Tapu Lele: 143-169 (97.9 – 115.7%) — 87.5% chance to OHKO
252 Atk Life Orb Blaziken Poison Jab vs. 4 HP / 0 Def Tapu Koko: 130-153 (89 – 104.7%) — 37.5% chance to OHKO
252 Atk Life Orb Blaziken High Jump Kick vs. 4 HP / 0 Def Kyogre: 149-177 (84.6 – 100.5%) — 6.3% chance to OHKO
252 Atk Life Orb Blaziken Flare Blitz vs. 4 HP / 0 Def Xerneas in Sun: 199-234 (98.5 – 115.8%) — 87.5% chance to OHKO
252 Atk Life Orb Blaziken Flare Blitz vs. 4 HP / 0 Def Yveltal in Sun: 199-234 (98.5 – 115.8%) — 87.5% chance to OHKO
252 Atk Life Orb Blaziken Flare Blitz vs. 252 HP / 4 Def Groudon in Sun: 142-169 (68.5 – 81.6%) — guaranteed 2HKO
252+ Atk Life Orb Blaziken Poison Jab vs. 4 HP / 0 Def Tapu Lele: 159-187 (108.9 – 128%) — guaranteed OHKO
252+ Atk Life Orb Blaziken Flare Blitz vs. 252 HP / 0 Def Solgaleo: 265-312 (108.6 – 127.8%) — guaranteed OHKO
252+ Atk Life Orb Blaziken Poison Jab vs. 4 HP / 0 Def Tapu Koko: 143-169 (97.9 – 115.7%) — 87.5% chance to OHKO
252+ Atk Life Orb Blaziken High Jump Kick vs. 4 HP / 0 Def Kyogre: 165-195 (93.7 – 110.7%) — 62.5% chance to OHKO
252+ Atk Life Orb Blaziken Flare Blitz vs. 4 HP / 0 Def Xerneas in Sun: 218-257 (107.9 – 127.2%) — guaranteed OHKO
252+ Atk Life Orb Blaziken Flare Blitz vs. 4 HP / 0 Def Yveltal in Sun: 218-257 (107.9 – 127.2%) — guaranteed OHKO


-1 252 Atk Blaziken All-Out Pummeling (195 BP) vs. 236 HP / 4 Def Incineroar: 228-270 (114 – 135%) — guaranteed OHKO
252 Atk Blaziken All-Out Pummeling (195 BP) vs. 4 HP / 0 Def Kyogre: 172-204 (97.7 – 115.9%) — 87.5% chance to OHKO
252+ Atk Blaziken All-Out Pummeling (195 BP) vs. 4 HP / 0 Def Kyogre: 189-223 (107.3 – 126.7%) — guaranteed OHKO


4 SpA Blaziken Overheat vs. 68 HP / 252 SpD Assault Vest Kartana in Rain: 156-184 (109 – 128.6%) — guaranteed OHKO
4 SpA Life Orb Blaziken Overheat vs. 252 HP / 0 SpD Groudon in Sun: 173-204 (83.5 – 98.5%) — guaranteed 2HKO


CHECKS AND COUNTERS


Salamence


Salamence’s Intimidate is enough to severely mess with Blaziken’s damage output, and Blaziken is forced to run Hidden Power [Ice] in order to properly damage the Dragon Pokemon. The pseudo Legendary Pokemon commonly carries Choice Scarf and Hydro Pump, meaning that it can still cripple Blaziken despite lacking a proper Flying Type STAB. While Salamence may not be a popular now, the return of Mega Evolution come Ultra Series will see it rise once more as a nasty foe that (Mega) Blaziken hates to face.


Kyogre


Kyogre’s Drizzle is a huge nerf to the effectiveness of Blaziken’s Fire Type STAB, though that won’t be enough to prevent the Blaze Pokemon from securing the OHKO on Ferrothorn and Kartana. The main threat lies in Choice Scarf variants, which Blaziken cannot outspeed with one Speed Boost alone unless it is of a Speed enhancing Nature, which itself is a slight inhibitor to Blaziken’s overall damage output. That said, Kyogre can’t safely switch in on a Hi Jump Kick since that is a clean 2HKO.


Lunala


Lunala is straight up immune to Blaziken’s Fighting Type STAB and can easily take a hit from the Blaze Pokemon while Shadow Shield is active. On the other hand, Lunala can easily threaten the OHKO on Blaziken with STAB Psyshock.


TEAMMATES


Groudon


Groudon, the OG Drought Pokemon, sets up the Weather condition that turns Blaziken’s Fire Type STAB into devastating nukes. It is also good at eliminating Fire Type foes like Incineroar, though Intimidate cuts both of their primary damage output. In return, Blaziken helps eliminate Grass Type threats like Venusaur, Tsareena, and Kartana.


Venusaur


Because the combination of Blaziken and Groudon isn’t exactly the safest way to deal with Kyogre, players are recommended to run a Grass Type ally to better deal with the Sea Basin Pokemon. While Ludicolo is arguably the better candidate for this job, Venusaur is featured here because it synergizes better with Groudon, as well as being more reliable as an option against Fairy Type foes. Additionally, Venusaur serves as a much more reliable answer to opposing Groudon thanks to STAB Grass Knot and being faster from the get go while Sun is active.


Tapu Koko


Tapu Koko serves as an answer to the Water Type and Flying Type threats to Blaziken, like Kyogre, Ho-Oh, Tornadus, and Yveltal. It can use Taunt to deny the setting up of Trick Room, which cuts Blaziken’s Speed advantage. It can also use Electroweb to slow vulnerable targets and make Speed Boost more effective against foes notable for holding a Choice Scarf. Players will need to take note that having both rooster-esque Pokemon on the team makes it weak to Precipice Blades.