
NOTE: This Tier List will is currently going under reconstruction to account for the new mechanics like the Sync Grid. When reconstruction is complete, this note will disappear accordingly.
First released on 25th July 2019 to Singaporean players and resourceful Android users, Pokemon Masters has quickly expanded on its original 65 man roster with multiple useful Sync Pairs. As a Gacha game, each Sync Pair comes with a unique feature meant to deal with different scenarios. As players jump into the game and learn the ropes, a tier list becomes highly useful to optimize resource management, especially if players do not have a lot of time and/or money to invest into the game.
This tier list is a combined tier list across roles (Strike, Tech, Support) and metagame (Single-Player, Co-Op), in an attempt to help newer players quickly understand which Sync Pairs they should invest in first. As a result, this Tier List will not feature every Sync Pair. Instead, only the most useful and notable members will be exhibited here. This does not imply that unlisted Sync Pairs are bad. They generally have operational niches that either take too much work to excel or are too situational to be useful. Players who has favorites that are not featured here are still encouraged to train them, and use this list to find the best complementary Sync Pairs to support their main unit. That said, this list seeks to be as objective as possible. Readers are highly encouraged to provide constructive criticism in the comments as to which Sync Pair should get a different ranking.
Tiers in this tier list are decided upon by how well each Sync Pair performs in the following three categories:
- 1. Self Sustenance
- This refers to how well the Sync Pair can function as a solo unit. The less support it requires from its allies, the higher it scores in this section. This usually implies a slight bias towards Strike roles, which is reasonable as they are always the focal point of any proper team construction. This becomes extremely important when one eventually starts to grind co-op levels. The rubrics for this category are as follows:
- Self Boost
- How well this Sync Pair does at boosting its own offensive stats like Attack, Sp. Attack, Accuracy, and Critical Hit rate.
- Damage Output
- How much this Sync Pair has in its Attack and/or Sp. Attack. The higher this number, the better.
- How much Base Power this Sync Pair’s highest damaging move has. The higher this number, the better.
- Move Gauge Refill
- How well it compensates for its drain on the Move Gauge. This usually favors Sync Pairs with ways to boost and/or retain its Speed.
- Rebuff / Anti Debuff
- How many turns it takes for this Sync Pair to regain its lost stat boosts, or how resistant they are to stat debuffs. For the former, the lesser this number, the better.
- Autopilot compatibility
- How well this Sync Pair functions on autopilot mode for repeated material farming purposes.
- Self Boost
- This refers to how well the Sync Pair can function as a solo unit. The less support it requires from its allies, the higher it scores in this section. This usually implies a slight bias towards Strike roles, which is reasonable as they are always the focal point of any proper team construction. This becomes extremely important when one eventually starts to grind co-op levels. The rubrics for this category are as follows:
- 2. Efficiency
- This refers to how well the Sync Pair performs in the game in general. Strike and Support roles are ranked on different criteria here.
- Strike
- Battle Villa
- How efficient it is at handling Battle Villa Halls. Sync Pairs that can do massive damage without delving deeply into its limited usage Trainer Moves tend to fare better here.
- Very Hard Supercourses
- How efficient it is at clearing the Very Hard Supercourses. This is important for grinding the Gym Leader Notes and Elite 4 Notes that are necessary to unlock the final Level Cap.
- Very Hard EX Challenges
- How efficient it is at clearing the Very Hard EX Challenges. This is important for grinding 2 Star Gear and its corresponding level up material.
- Battle Villa
- Tech/Support
- Bulk
- How bulky the Sync Pair is. The bulkier the Sync Pair, the more firepower it draws to itself, which is pivotal in keeping the team’s Strike Sync Pair alive. The higher this number, the better.
- Team Support
- How well the Sync Pair supports the team, like the refilling of Move Gauge and boosting of the team’s stats. The higher this number, the better.
- Bulk
- All
- Flexibility
- How well it can fit across most of the team archetypes.
- Flexibility
- Strike
- This refers to how well the Sync Pair performs in the game in general. Strike and Support roles are ranked on different criteria here.
- 3. Availability
- This refers to how easily the players can obtain this Sync Pair, in descending order below:
- F2P
- 3*
- 4*
- 5*
- This refers to how easily the players can obtain this Sync Pair, in descending order below:
The tiers are as follows:
- Premier Tier
- This tier houses the cream of the crop. The top Sync Pairs that either serve as the focal points of any team that they are on, or the best representative of their respective role category reside in this tier. Players can stop their re-rolling immediately if they obtain any of the Sync Pairs featured in the top most rung of this tier.
- A Tier
- This tier houses highly valuable Sync Pairs that are further split into A+, A, and A- according to the relative importance and irreplaceability on one’s team for the role that it plays. Most of these Sync Pairs fare exceptionally well in the co-op stages, especially the EX Challenges.
- B Tier
- This tier houses valuable Sync Pairs that are either a less expensive alternative to the entries above, or lack a proper metagame to heighten the demand for their services. Likewise, it is also split into similar sub-tiers.
- C Tier
- This tier houses the rest of the useful free Sync Pairs that all players will receive from the game’s story, as well as a few notable Sync Pairs that have operationally useful niches.
Premier Tier
Strike
Sygna Suit Red & Charizard (MX)
- High Self Sustenance
- Self Boost
- My Destiny! > +3 Sp. Attack and Speed, +3 Attack (if used as Mega Charizard X)
- -1 Defense and Sp. Def (Fix through X Defense All, X Sp. Def All or similar support from ally).
- Dire Hit + > +2 Critical Hit rate.
- Propulsion 1 > Chance to reduce Sync Move meter by 1 per each successful move.
- My Destiny! > +3 Sp. Attack and Speed, +3 Attack (if used as Mega Charizard X)
- Damage Output
- High Base Attack and Sp. Atk (Highest natural Base Sp. Atk after Mega Evolution).
- High raw power of Heat Wave.
- High raw power of Blast Burn.
- Heat Wave and Blast Burn do not have perfect accuracy (Fix through Piercing Gaze).
- Blast Burn costs a whopping 4 Move Gauge slots (Fix through Move Gauge Refresh 4 on self or similar support from ally).
- High raw power of Sync Move (Living Legend Blast Burn).
- Damage can be boosted through Weather Condition (Sun).
- Move Gauge Refill
- Move Gauge Refill 4 has decent chances of restoring Move Gauge by 1 per successful move.
- Self Boost
- Efficiency
- Heat Wave is one of the most powerful spread moves in the game, allowing for faster clearing of the board.
- Heat Wave suffers from drastic spread damage reduction: x0.5 against 3 foes, x0.67 against 2 foes (No Fix).
- Battle Villa
- Best Powerhouse
- Dire Hit + MP Refresh on Sync Grid helps maximize Charizard’s damage output throughout the Halls.
- Best Powerhouse
- Very Hard Supercourses
- Fantastic Single Player Powerhouse
- Very Hard EX Challenges
- Fantastic for Fire weak EX Challenges.
- Heat Wave is one of the most powerful spread moves in the game, allowing for faster clearing of the board.
Giovanni & Mewtwo
- Good Self Sustenance
- Self Boost
- Nowhere To Hide! > +2 Critical Hit rate, +1 Evasiveness
- Damage Output
- High Base Sp. Atk.
- Self Boost
- Moderate Availability
- Free
- Takes a lot of grinding to get the Base Sync Version, even more so to fully level his Sync (No Fix).
- Free
- Unique Feature – 2 Types
- Being able to deal damage from 2 different Types makes Giovanni flexible as a choice across different stages.
- Unique Feature – Raw Power
- It is currently the only Sync Pair that naturally breaks the 400 mark in Sp. Atk without having to go through Mega Evolution or Potential Upgrades. This allows it to pretty much nuke from the get go once brought to its highest Level Cap.
| Brendan & Treecko – Grovyle – Sceptile |


|
|
| Olivia & Lycanroc (Midnight) |
 |
|
Support
| Phoebe & Dusclops – Dusknoir |


|
|
Sygna Suit Elesa & Rotom
- High Efficiency (Support)
- Fantastic Bulk
- Highest Combined Bulk Rating (March 2020)
- Look Alive 9 > Increases evasiveness when hit
- Team Support
- X Sp. Atk All > Team Buff Sp. Atk (+2).
- Breathtaking! > Reduces Sync Move countdown by 2, +1 (+2 if Sync Buff active) Accuracy and Critical hit rate.
- Battle Villa
- Best redirector for Battle Villa.
- Flexibility
- Top Overall Redirector cum Support.
- Fits easily onto any Special Strike team composition.
- Fantastic Bulk
3* Sync Pairs
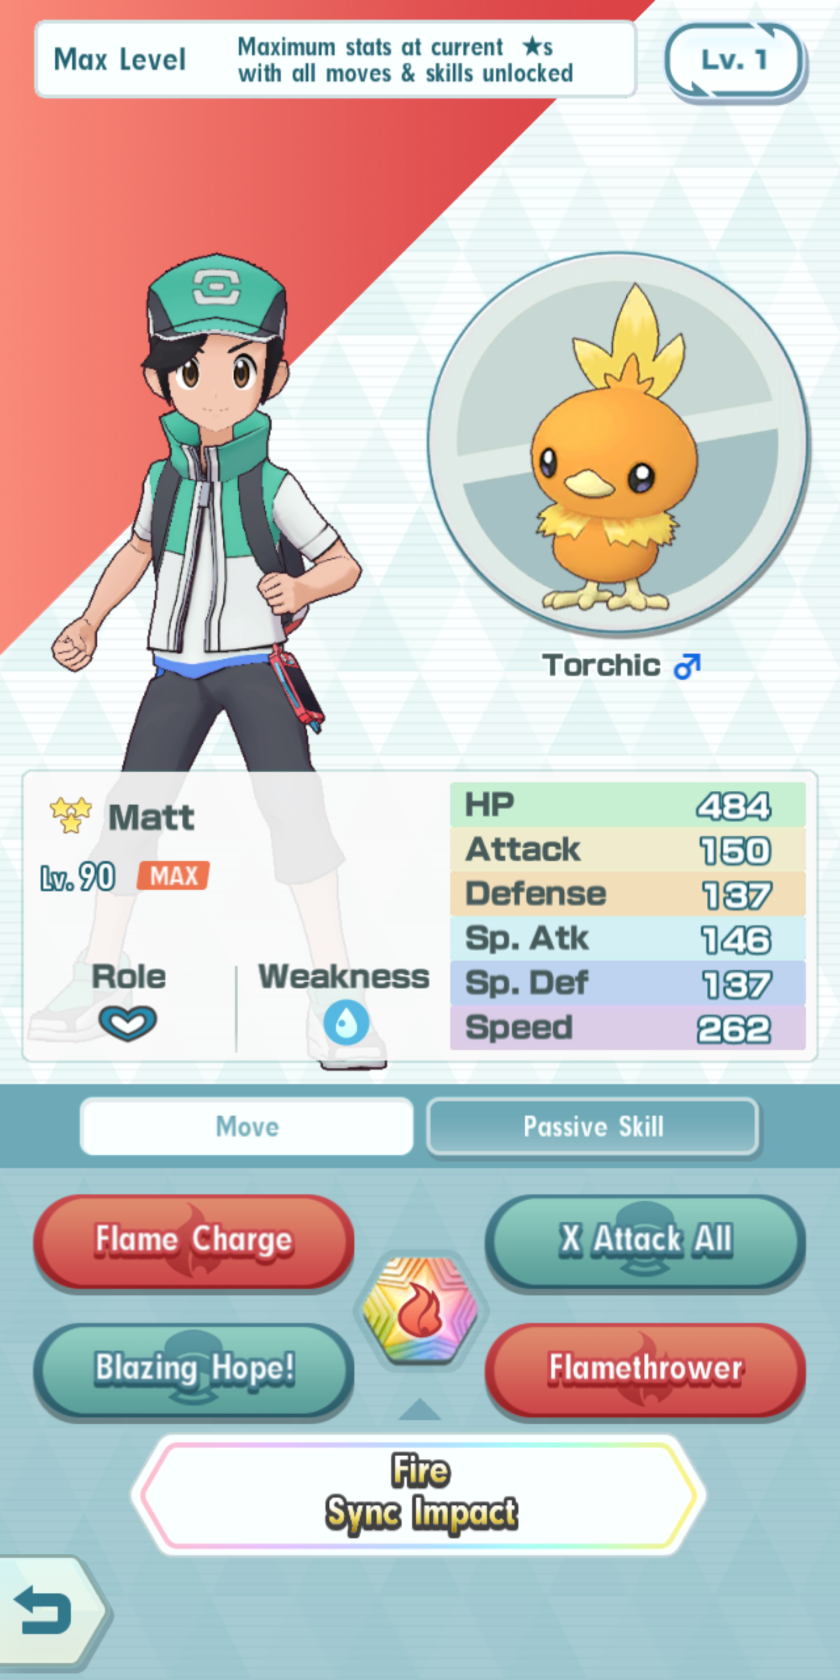
| Main Character & Torchic |
 |
|
| Roxanne & Nosepass – Probopass |


|
|
A Tier
A+ Strike
5* Sync Pairs
| Kris & Totodile – Croconaw – Feraligatr |


|
|
Steven Stone & Metagross (M)
- Good Self Sustenance
- Self Boost
- X Attack > +2 Attack.
- Best There Is! > +1 Defense, makes the next move a guaranteed and critical hit. If used after Mega Evolution, gives Endure.
- Damage Output
- High Base Attack
- Power Chain 3 > Boosts the power of moves when Unity bonus is in effect (From 1.25x to 2x).
- Rebuff/Anti-Debuff
- Impervious > Prevents stat drops – Stat boosts are permanent, allowing for better abuse of set up play against opposing debuffs.
- Self Boost
- Unique Feature – Fast Move
- It is one of the few Sync Pairs that gains access to a Fast Move, in this case Bullet Punch. While it can only be used 3 times, it does not drain the Move Gauge, allowing Mega Metagross to maintain damage output while waiting for its Move Gauge to refill after using its Sync Move.
Cynthia & Garchomp (M)
- Moderate Self Sustenance
- Self Boost
- X Attack > +2 Attack.
- This Match Is Too Fun! > +1 Speed and Critical Hit rate, (+2 when used under Sand).
- Surging Sand 5 > Powers up moves in a Sandstorm.
- Damage Output
- Good Base Attack (High Base Attack after Mega Evolution).
- Move Gauge Refill
- Its Passive Skill buffs Speed occasionally, allowing for faster replenishment of Garchomp’s Move Gauge.
- Earthquake is a huge Move Gauge drain (Fix through X Speed All, instant Move Gauge refill, or similar support from ally).
- Its Passive Skill buffs Speed occasionally, allowing for faster replenishment of Garchomp’s Move Gauge.
- Self Boost
- Good Efficiency
- Earthquake is one of the most powerful spread moves in the game, allowing for faster clearing of the board.
- Earthquake suffers from drastic spread damage reduction: x0.5 against 3 foes, x0.67 against 2 foes (No Fix).
- Battle Villa
- Decent powerhouse.
- Very Hard EX Challenges
- Good to have for EX Hau.
- Earthquake is one of the most powerful spread moves in the game, allowing for faster clearing of the board.
- Unique Feature – Ground Shift
- Ground Shift turns Mega Garchomp’s Slash into a Ground Type move. This synergizes well with This Match Is Too Fun! to give Mega Garchomp a strong single target move after Mega Evolution.
4* Sync Pairs
| Noland & Pinsir (M) |


|
|
A+ Support
5* Sync Pairs
Leaf & Eevee
- High Efficiency (Support)
- Team Support
- Potion heals an ally and keeps it on the field for a longer period of time.
- Let’s Go! refills Move Gauge by 2 and self buffs Attack (+2).
- Endless Possibilities Extreme Evoboost
- Refills self’s Move Gauge by Sync Move level.
- Team Buffs Attack, Defense, Sp. Atk, Sp. Def, and Accuracy (+2).
- Can only be used as a Sync Move
- Benefactor
- Passes all accumulated boosts when switching.
- Impervious > Prevents stat drops – Stat boosts are permanent, allowing for better abuse of set up play against opposing debuffs.
- Flexibility
- Superb Overall Redirector cum Support.
- Fits easily onto any team composition.
- Team Support
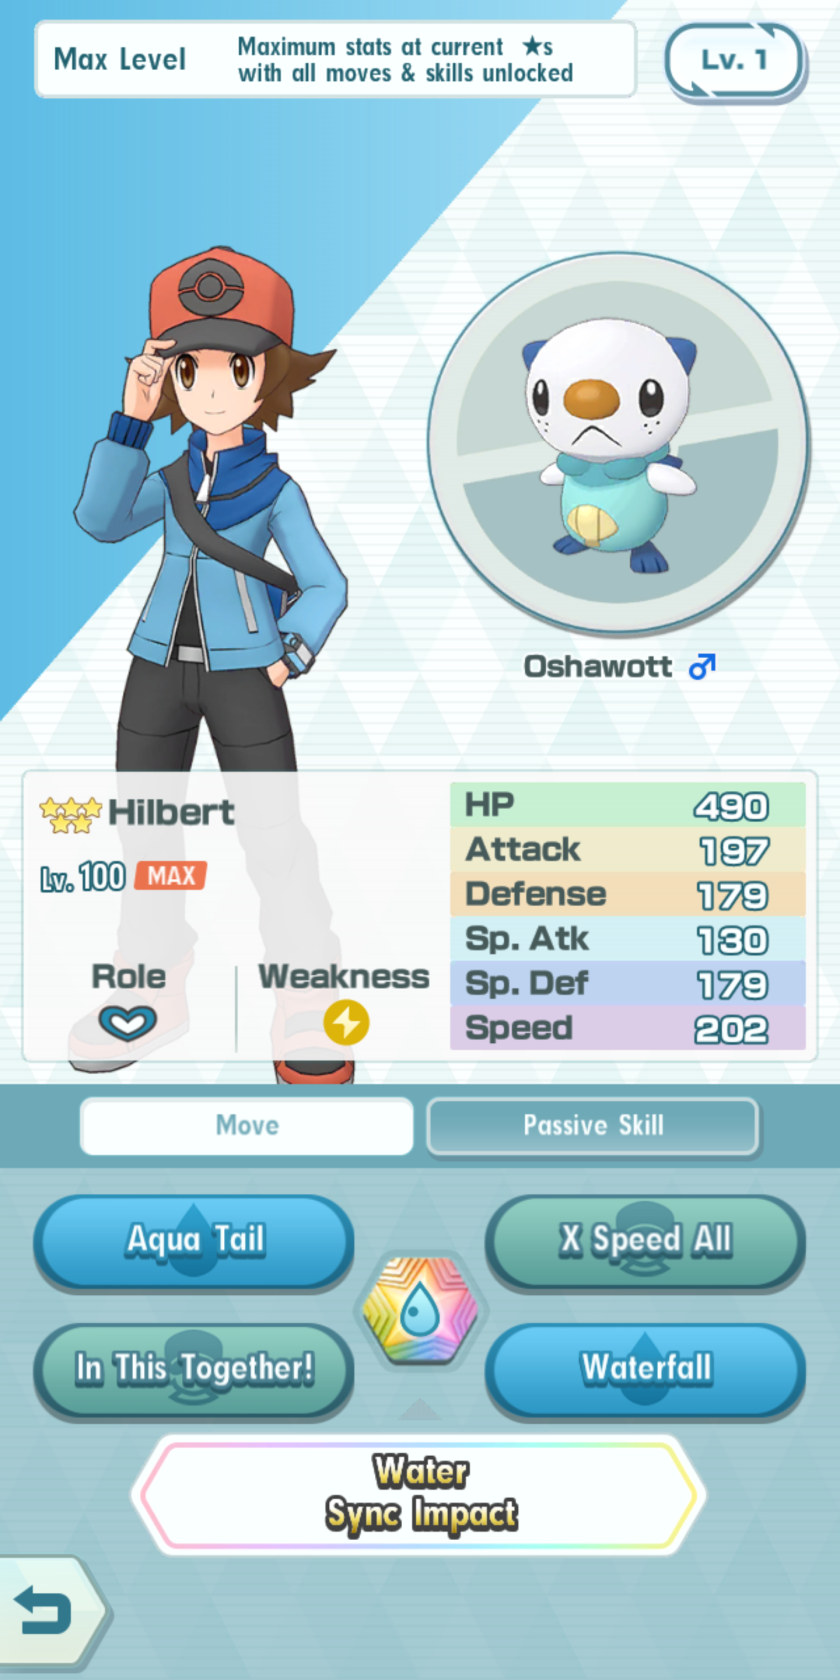
| Hilbert & Oshawott – Dewott – Samurott |
 |
|
| Rosa & Snivy – Servine – Serperior |


|
|
Rosa (Holiday 2019) & Delibird
- High Efficiency (Support)
- Good Bulk
- Good Bulk rating
- Low Base HP (No Fix).
- Good Bulk rating
- Team Support
- X Attack All > Team Buff Attack (+2).
- All The Presents! > Move Gauge Acceleration, Team Buff Speed (+1), Team Random Buff (+2).
- Flexibility
- Fits easily onto any Physical Strike team composition.
- Good Bulk
A- Strike
5* Sync Pairs
Main Character & Solgaleo
- High Self Sustenance
- Self Boost
- Bright As the Sun! > 3 Bars > +3 Attack, Sp. Attack, Accuracy.
- Damage Output
- High Base Attack, Good Base Sp. Attack.
- Sunsteel Strike ignores all damage reduction effects.
- High raw power of Focus Blast
- Focus Blast does not have perfect accuracy (Fix through Bright As the Sun! on self or similar support from ally).
- High raw power of Sync Move (Shining Friendship Sunraze Smash).
- Rebuff/Anti-Debuff
- Impervious > Prevents stat drops – Stat boosts are permanent, allowing for better abuse of set up play against opposing debuffs.
- Self Boost
- High Efficiency
- Very Hard Supercourses
- Fantastic Single Player Powerhouse
- Flexibility
- Can attack from both Attack and Sp. Atk with its Sunsteel Strike and Focus Blast respectively.
- Fits easily onto any team composition.
- Very Hard Supercourses
- Good Availability
- Free
- Only available via Legendary Event (No Fix).
- Free
- Unique Feature – 2 Types
- Being able to deal damage from 2 different Types makes Main Character & Solgaleo flexible as a choice across different stages.
| Blue & Pidgeot (M) |


|
|
| Karen & Houndoom (M) |


|
|
3* Sync Pairs
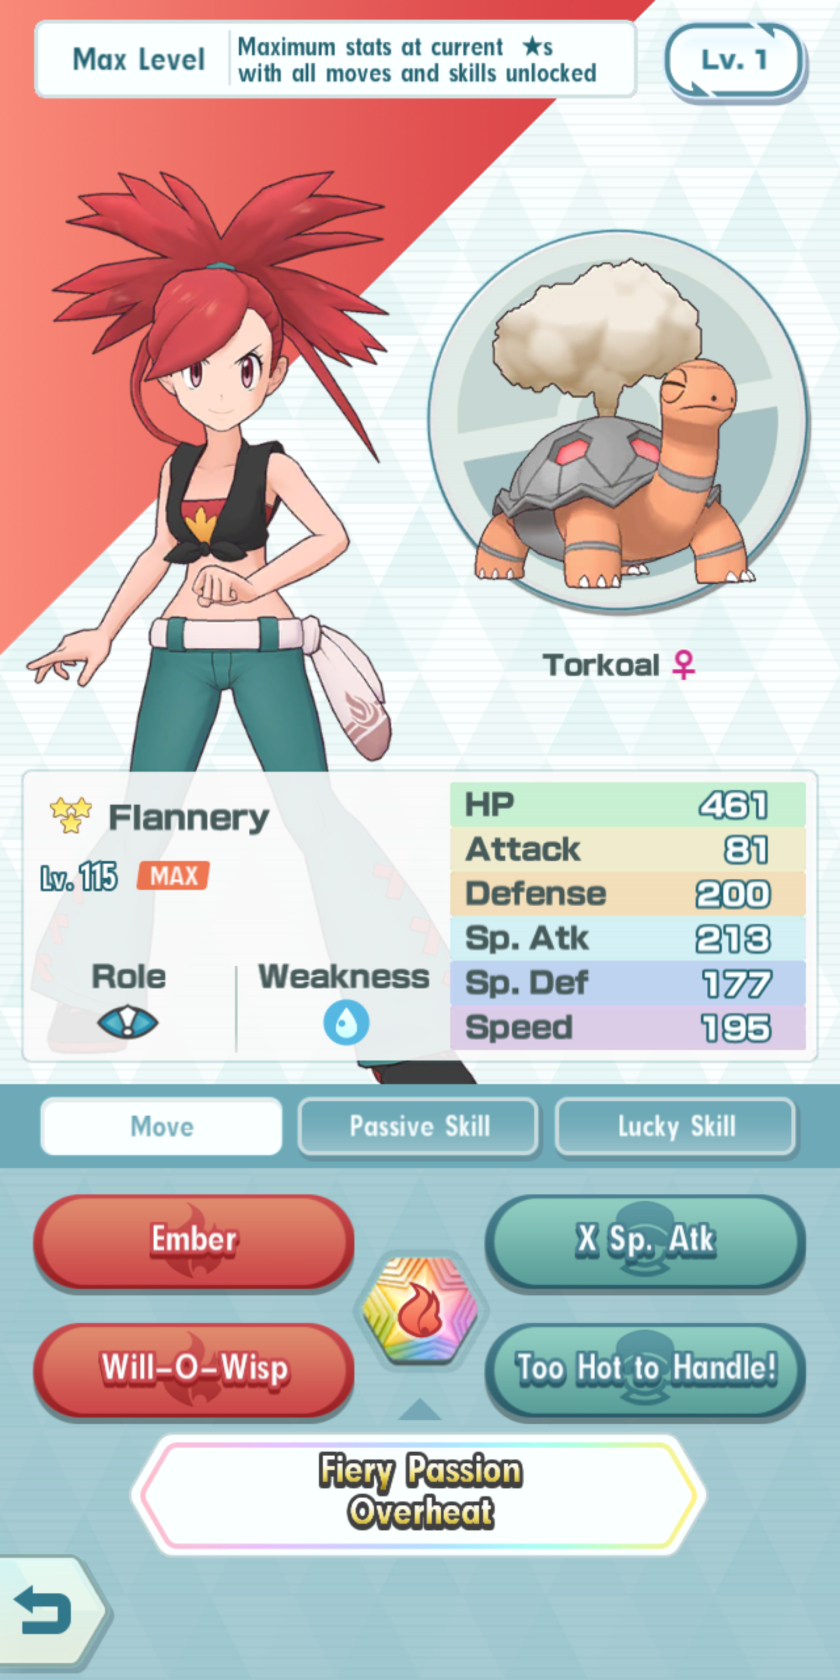
| Flannery & Torkoal |
 |
|
A BorderLine
4* Sync Pairs
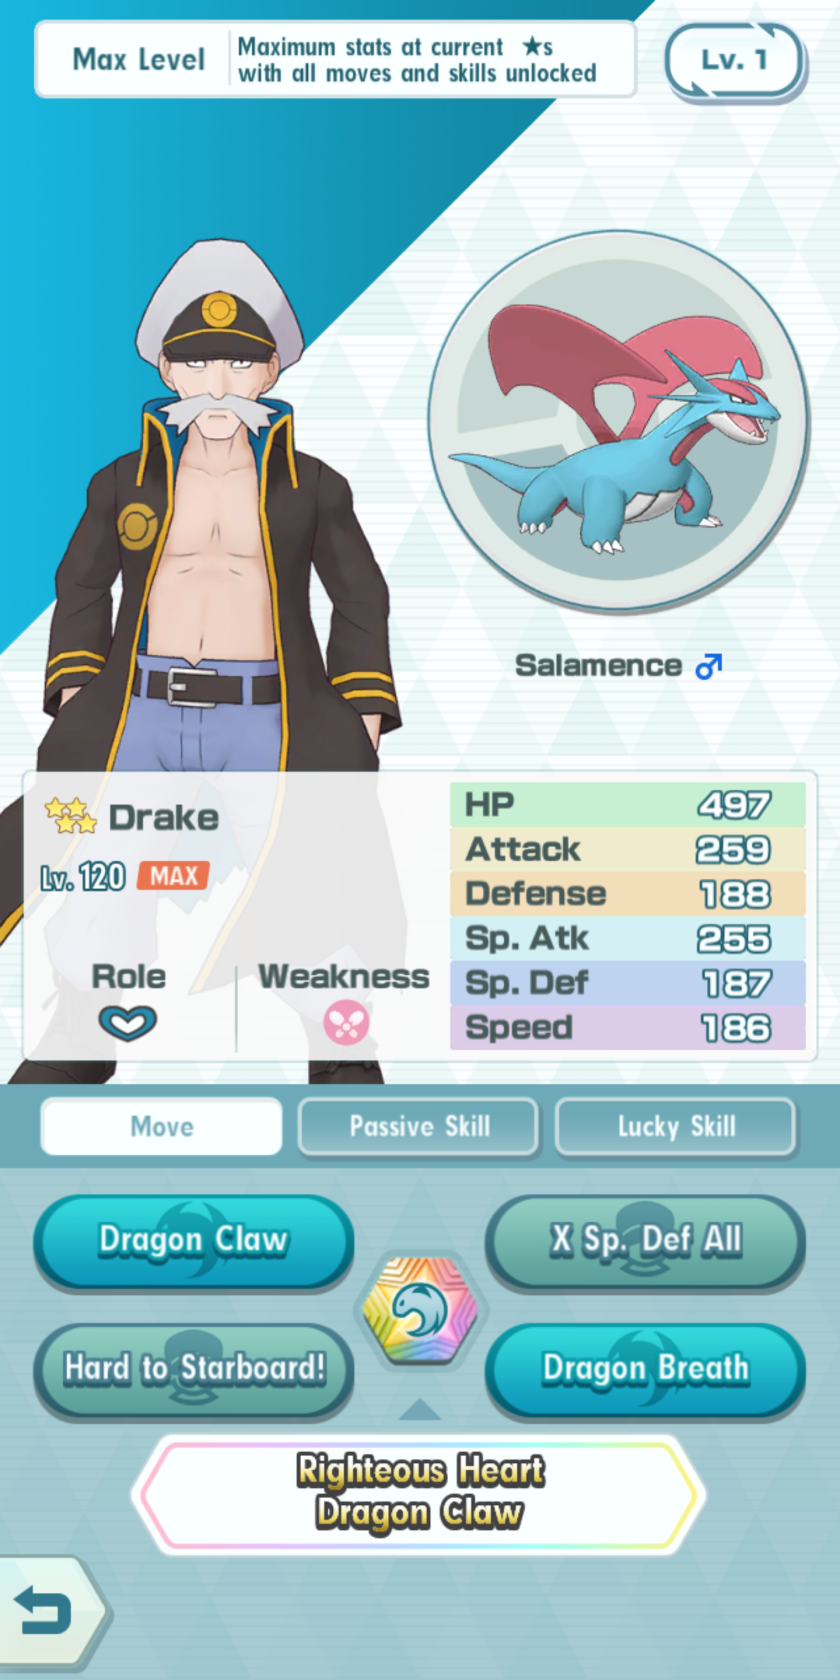
| Drake & Salamence |
 |
|
| Flint & Infernape |
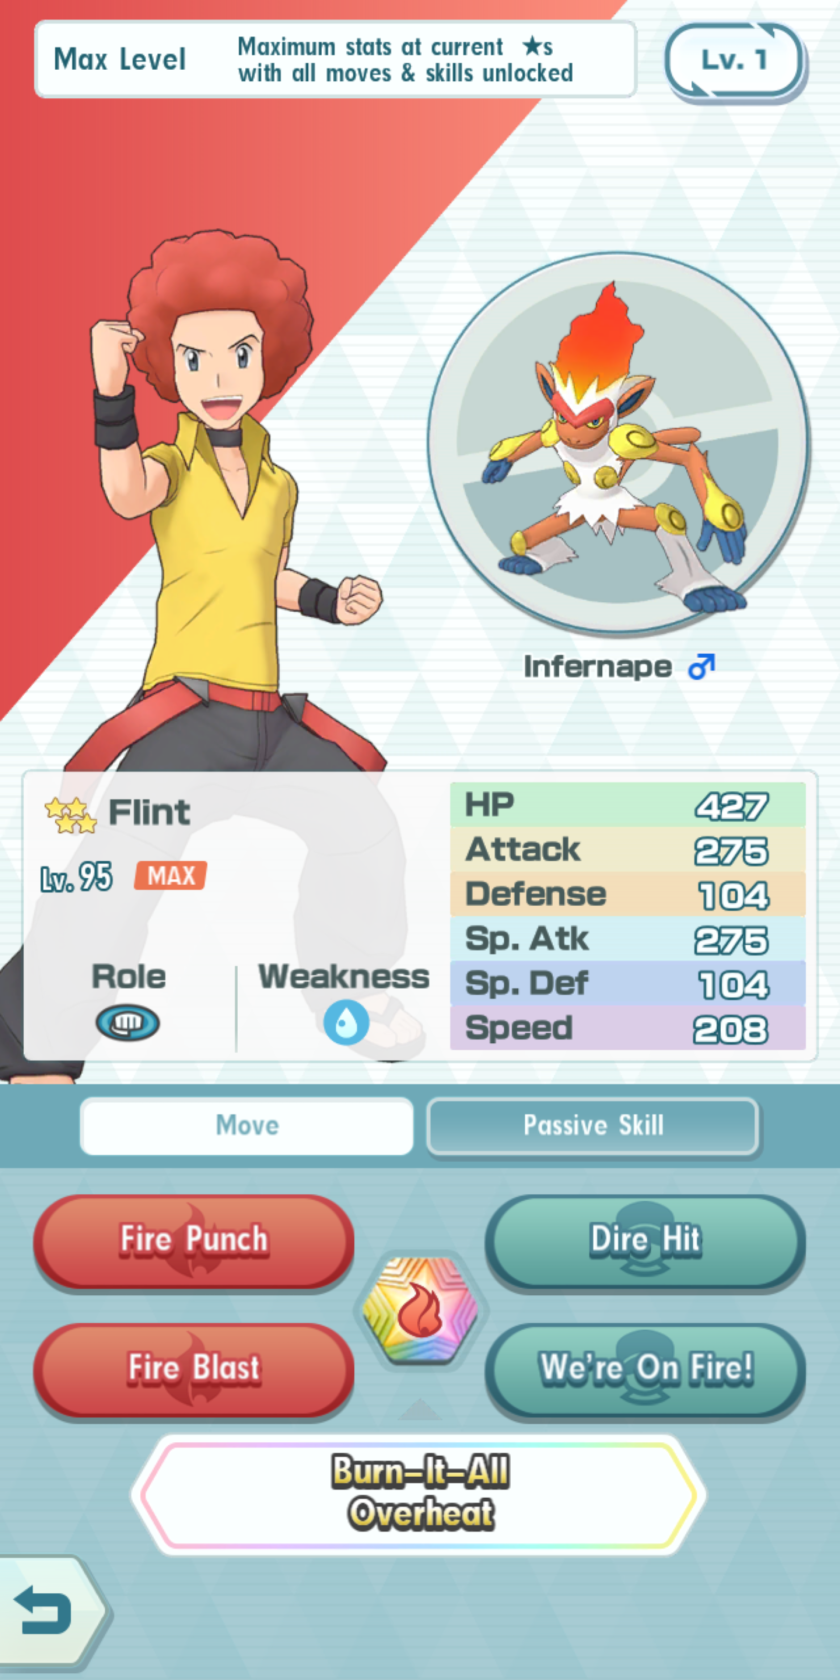 |
|
3* Sync Pairs
Professor Oak & Mew
Pryce & Seel – Dewgong
- Best Ice Type Strike option in game.
- Good Efficiency
- Icy Wind is a very good spread move, allowing for faster clearing of the board while simultaneously lowering the Speed on all foes.
- Icy Wind suffers from drastic spread damage reduction: x0.5 against 3 foes, x0.67 against 2 foes (No Fix).
- Icy Wind is a very good spread move, allowing for faster clearing of the board while simultaneously lowering the Speed on all foes.
- High Availability
- Free
- Available as early as Chapter 8.
B Tier
B+ Strike
5* Sync Pairs
Lance & Dragonite
- Good Self Sustenance
- Self Buff
- Now or Never! > Move Gauge Refill (+6).
- Costs 50% of Dragonite’s remaining HP (Fix through Potion on self).
- Potion > Heals self.
- Now or Never! > Move Gauge Refill (+6).
- High Damage Output
- High Base Attack and Sp. Atk.
- High Raw Power of Hyper Beam
- Hyper Beam does not have perfect accuracy (Fix through X Accuracy All or similar support from ally).
- Hyper Beam costs a whopping 4 Move Gauge slots (Fix through Now or Never! on self or similar support from ally).
- Self Buff
- Unique Feature – Dragon Shift
- Dragon Shift turns Hyper Beam into a Dragon Type move, allowing it to deal massive damage against Dragon weak foes. However, this is only a slight improvement, since Dragon Type is one of the worst offensive Types in Pokemon Masters, and unlike Water Shift, does not get any further power boosts from Weather.
4* Sync Pairs
| Will & Xatu |
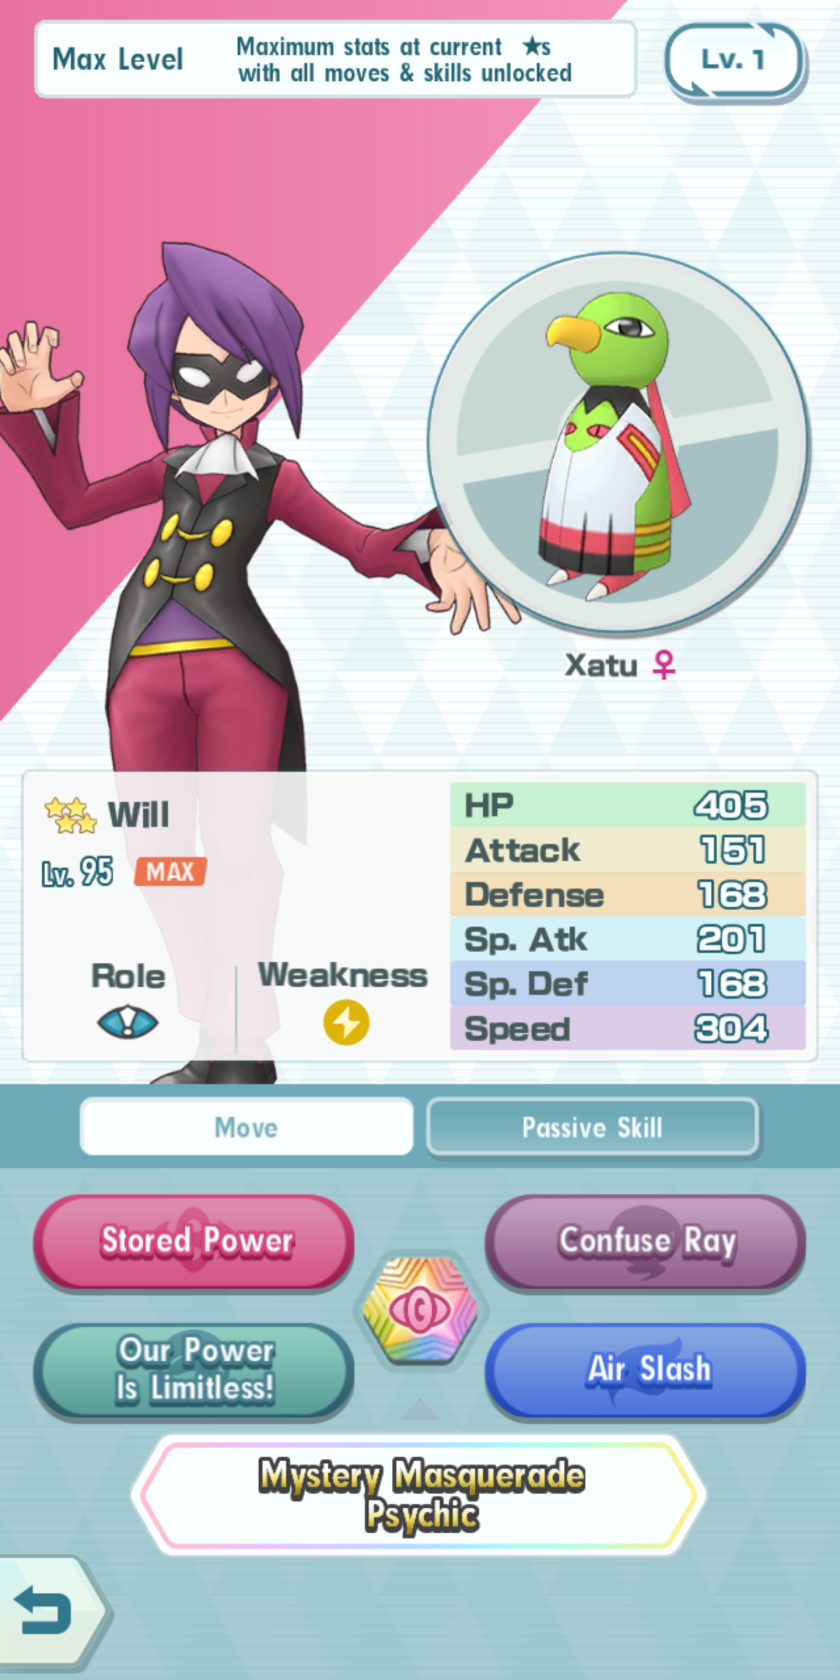 |
|
| Hau & Alolan Raichu |
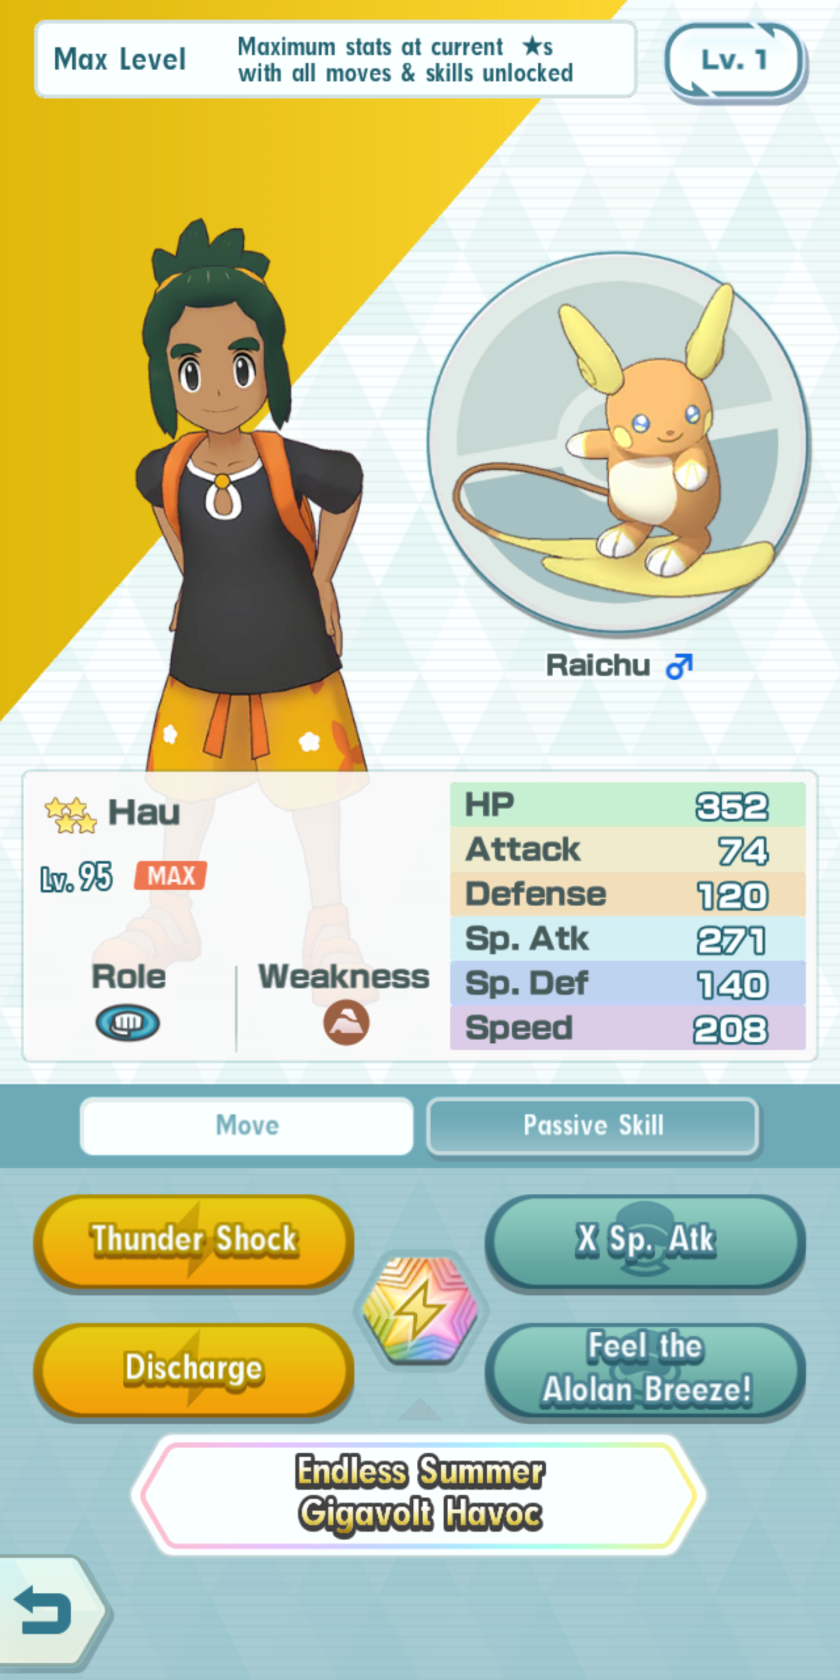 |
|
3* Sync Pairs
| Korrina & Lucario (M) |


|
|
B- Strike
5* Sync Pairs
Hilda & Tepig – Pignite – Emboar
- High Self Sustenance
- Self Boost
- Flame Charge > Damage, +1 Speed.
- Try and Stop Us! > 1 turn, +(n) Attack; (n) refers to number of Speed boosts already accumulated on self.
- Potion > Heals self.
- Passive Skill: First Aid 4 > Heal when in a pinch.
- Damage Output
- High Base Attack
- High raw power of Flare Blitz
- Flare Blitz incurs a hefty 25% recoil (Fix through Potion on self or similar support from ally).
- Damage can be boosted through Weather Condition (Sun).
- Self Boost
- High Efficiency
- Very Hard Supercourses
- Fantastic Single Player Powerhouse
- Very Hard EX Challenges
- Good to have for EX Rosa.
- Absolute must have for EX Korrina.
- Very Hard Supercourses
| Elesa & Zebstrika |
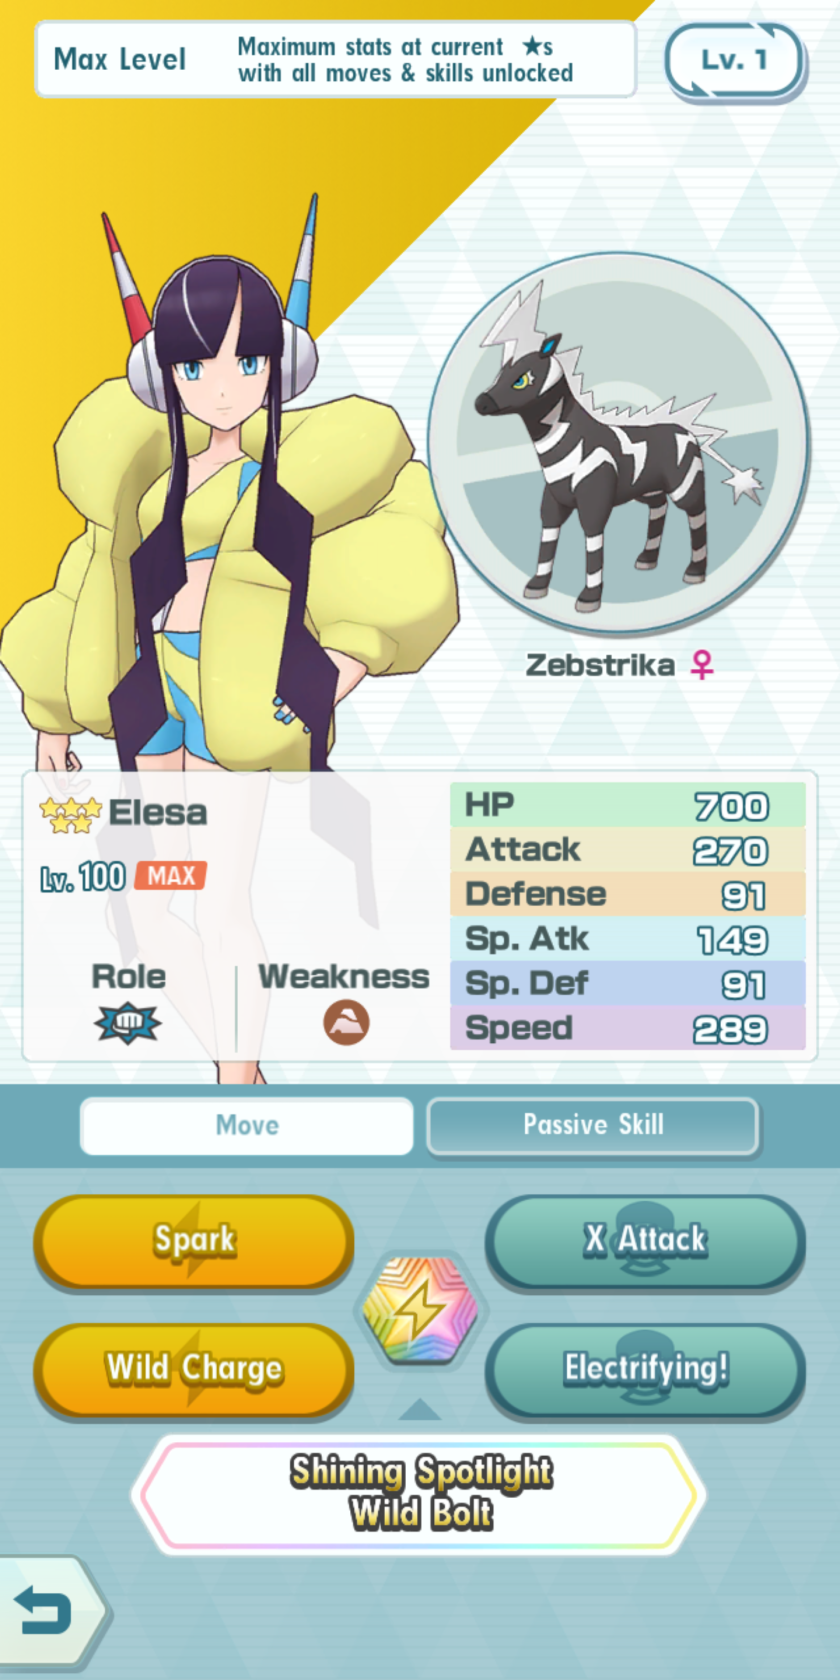 |
|
4* Sync Pairs
Agatha & Gengar (M)
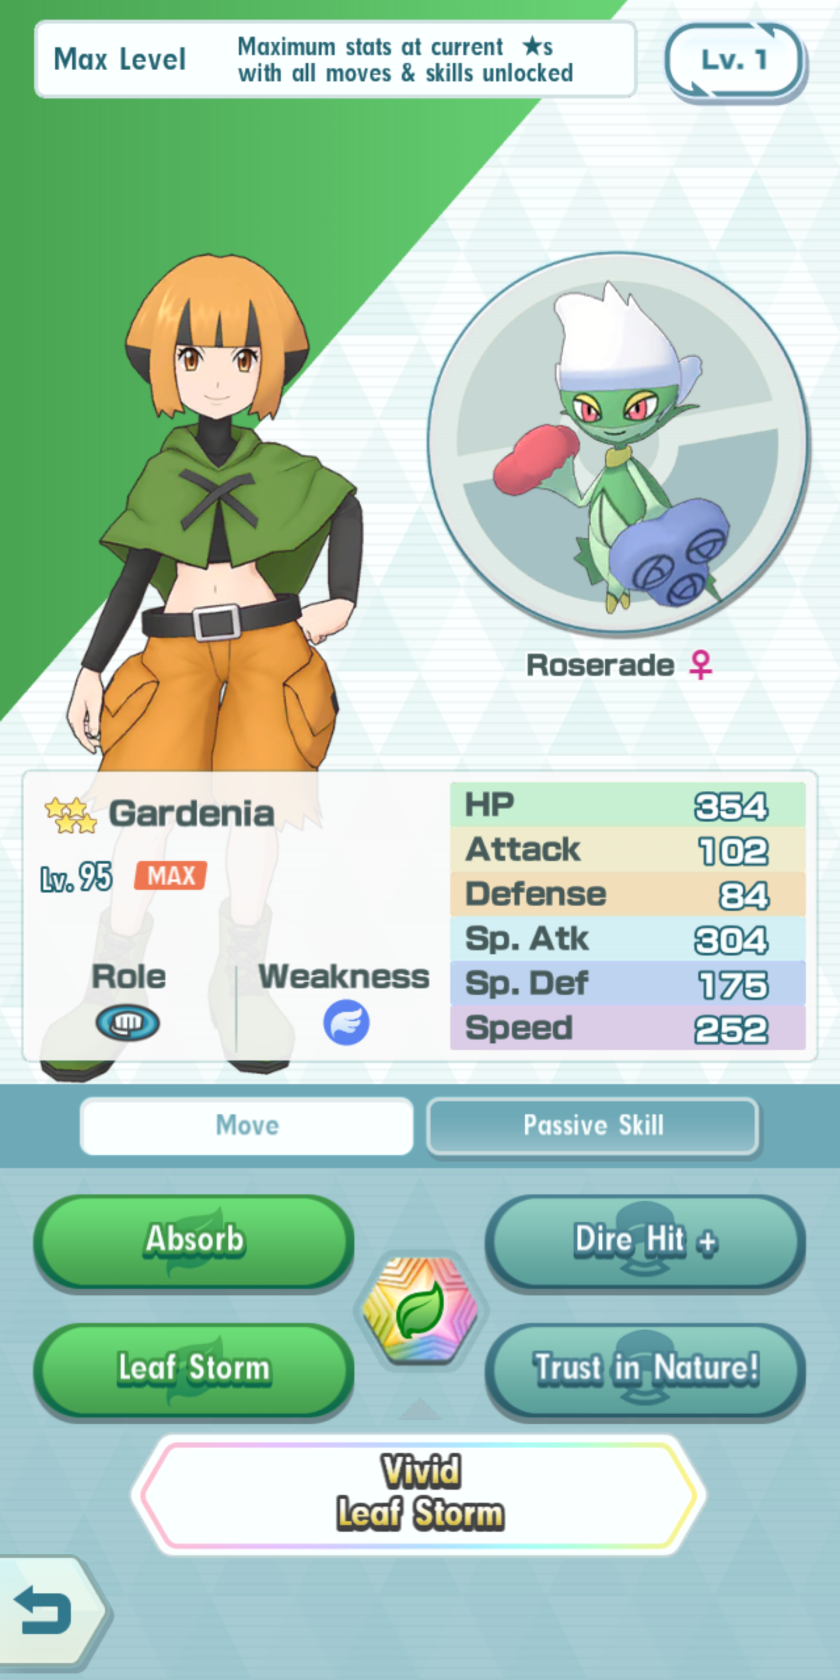
| Gardenia & Roserade |
 |
|
B- Support
5* Sync Pairs
| Glacia & Glalie (M) |


|
|
3* Sync Pairs
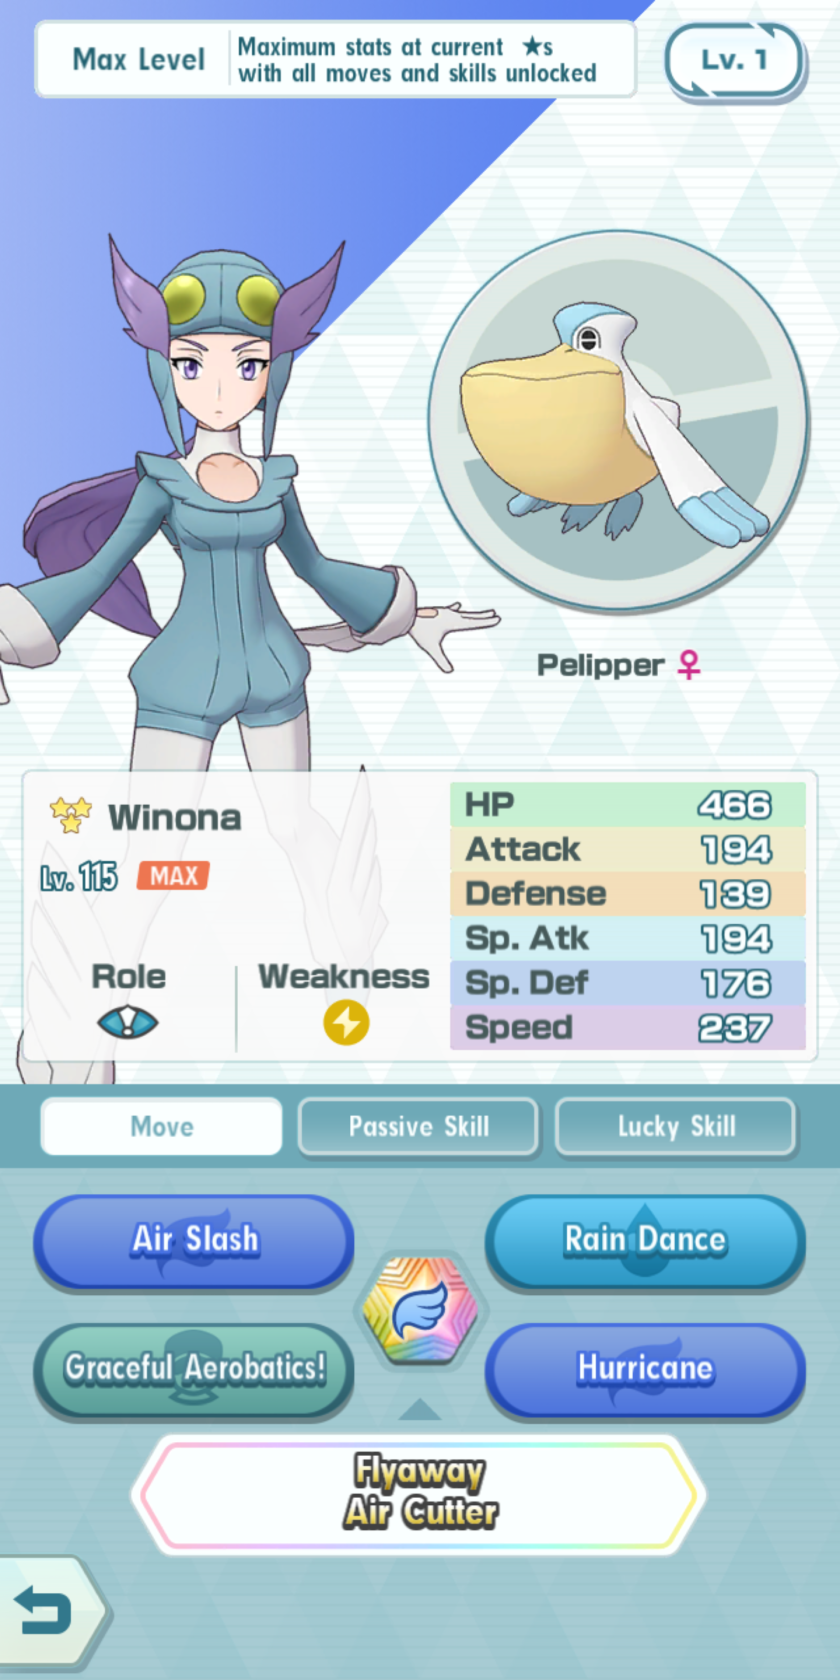
| Winona & Pelipper |
 |
|
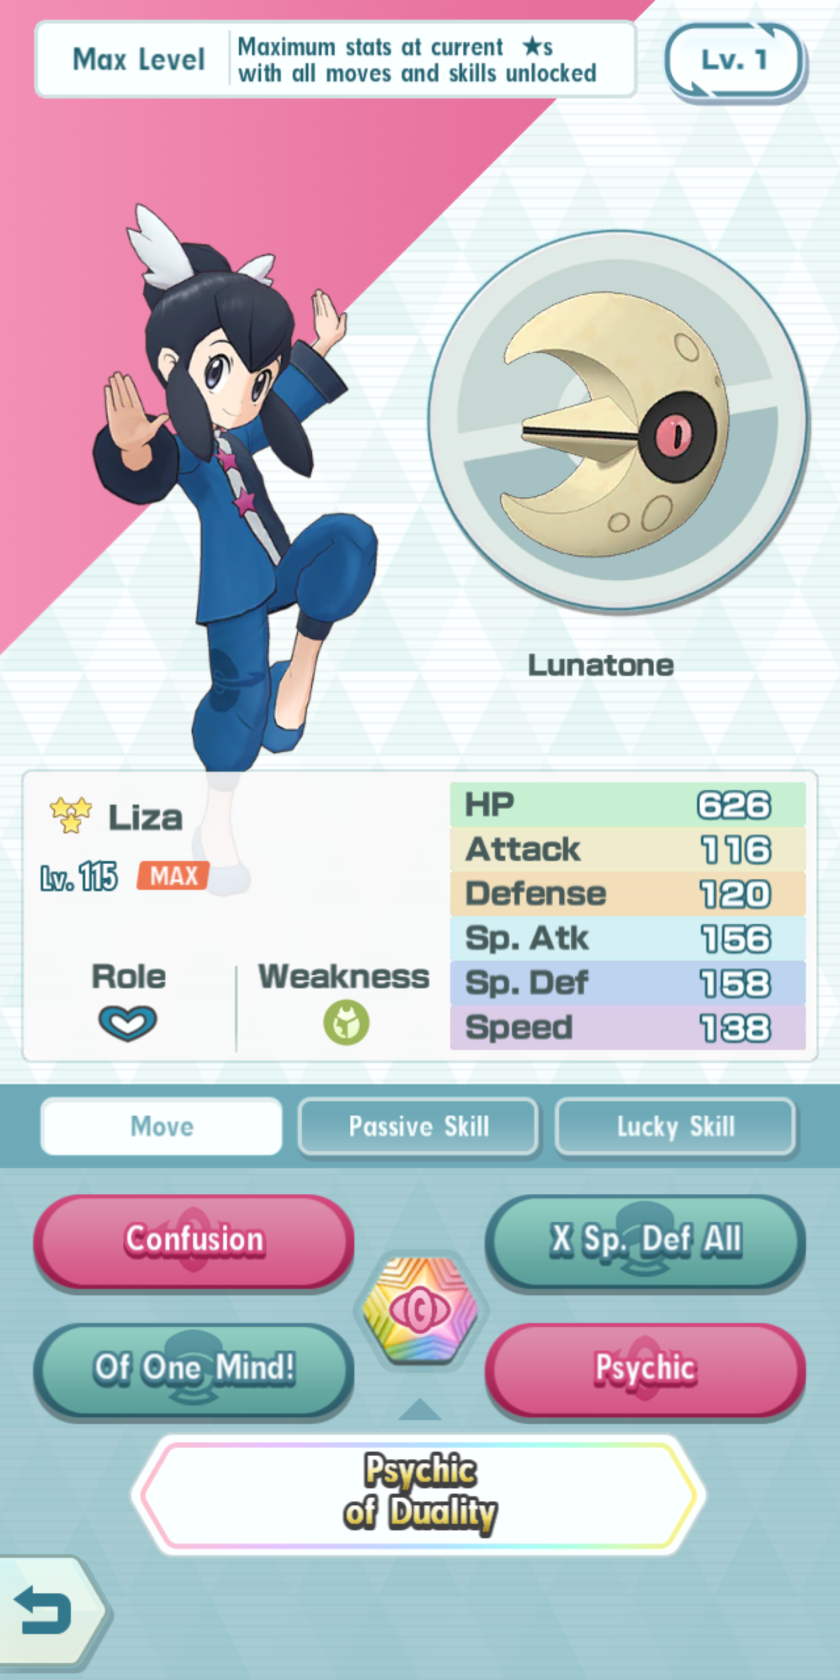
| Liza & Lunatone |
 |
|
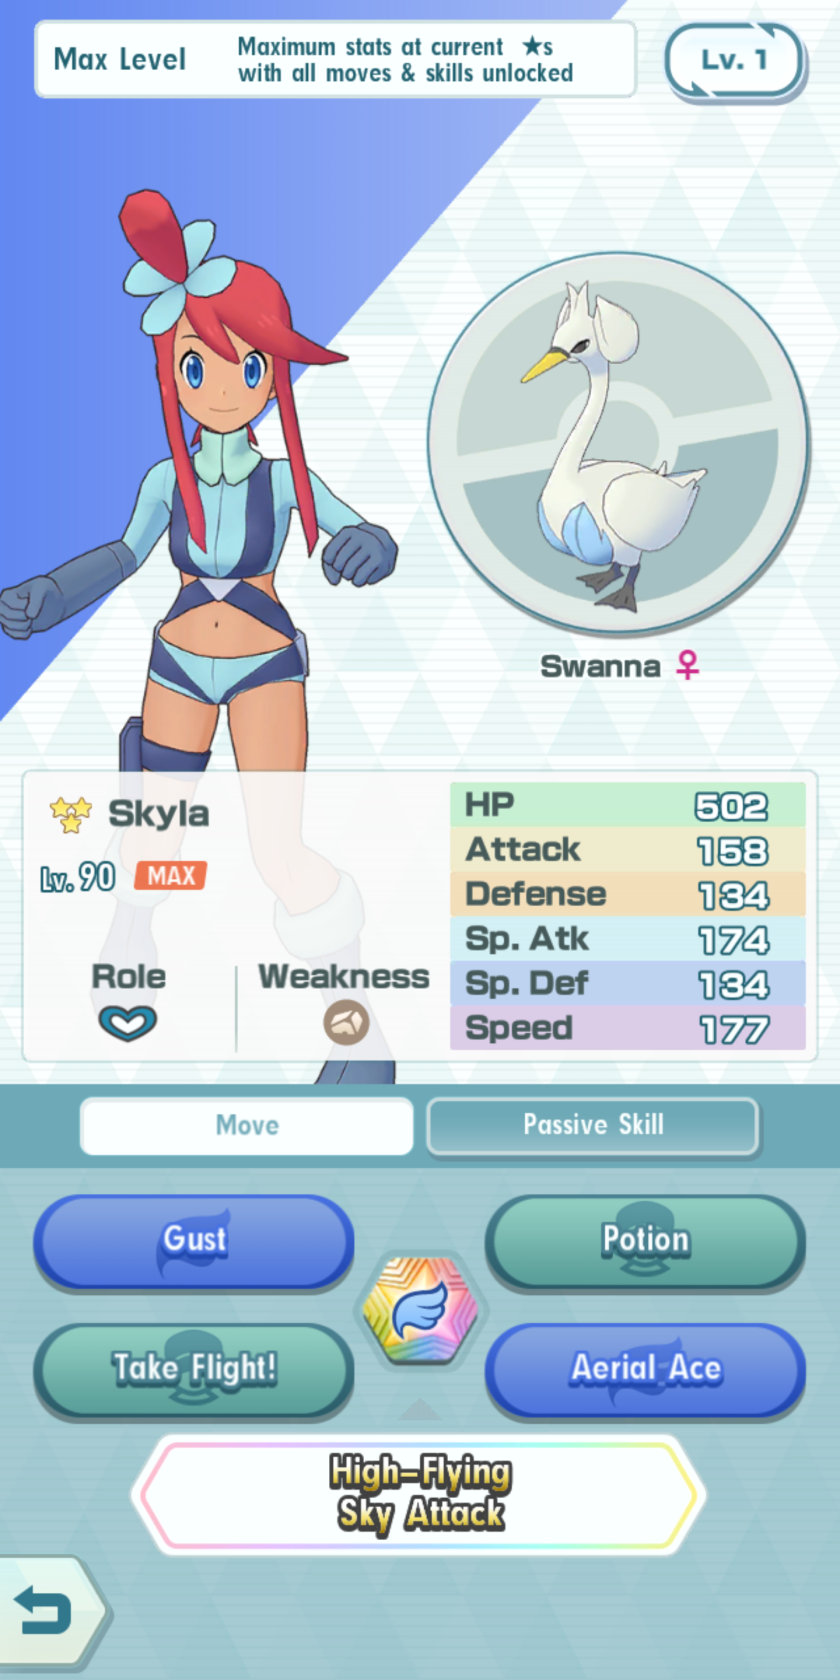
| Skyla & Swanna |
 |
|
B BorderLine
5* Sync Pairs
Sabrina & Alakazam (M)
| Lyra & Chikorita – Bayleef – Meganium |


|
|
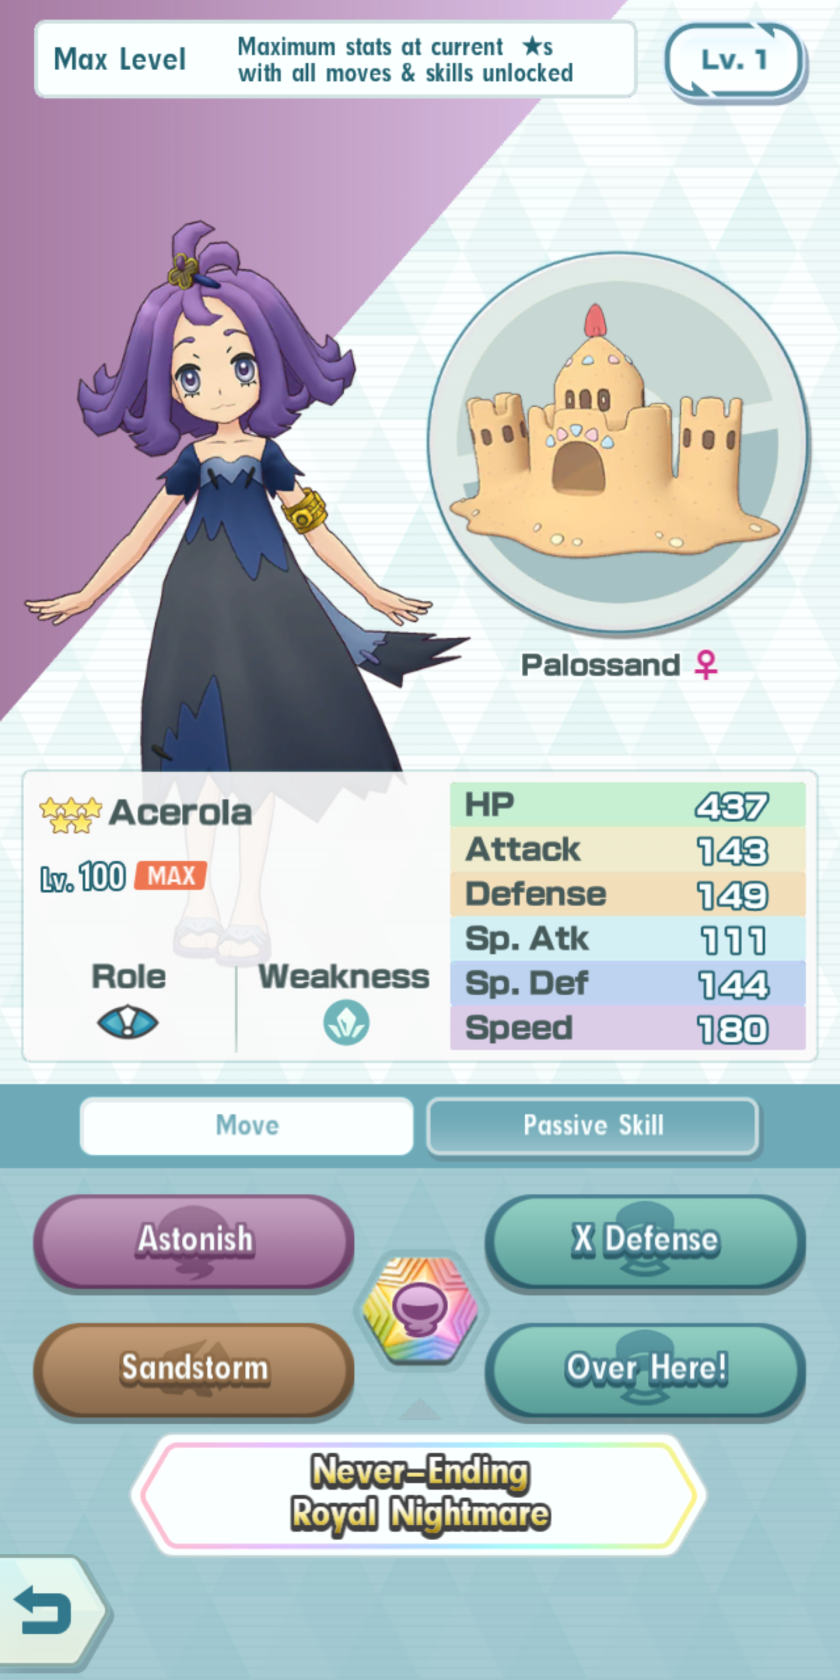
| Acerola & Palossand |
 |
|
3* Sync Pairs
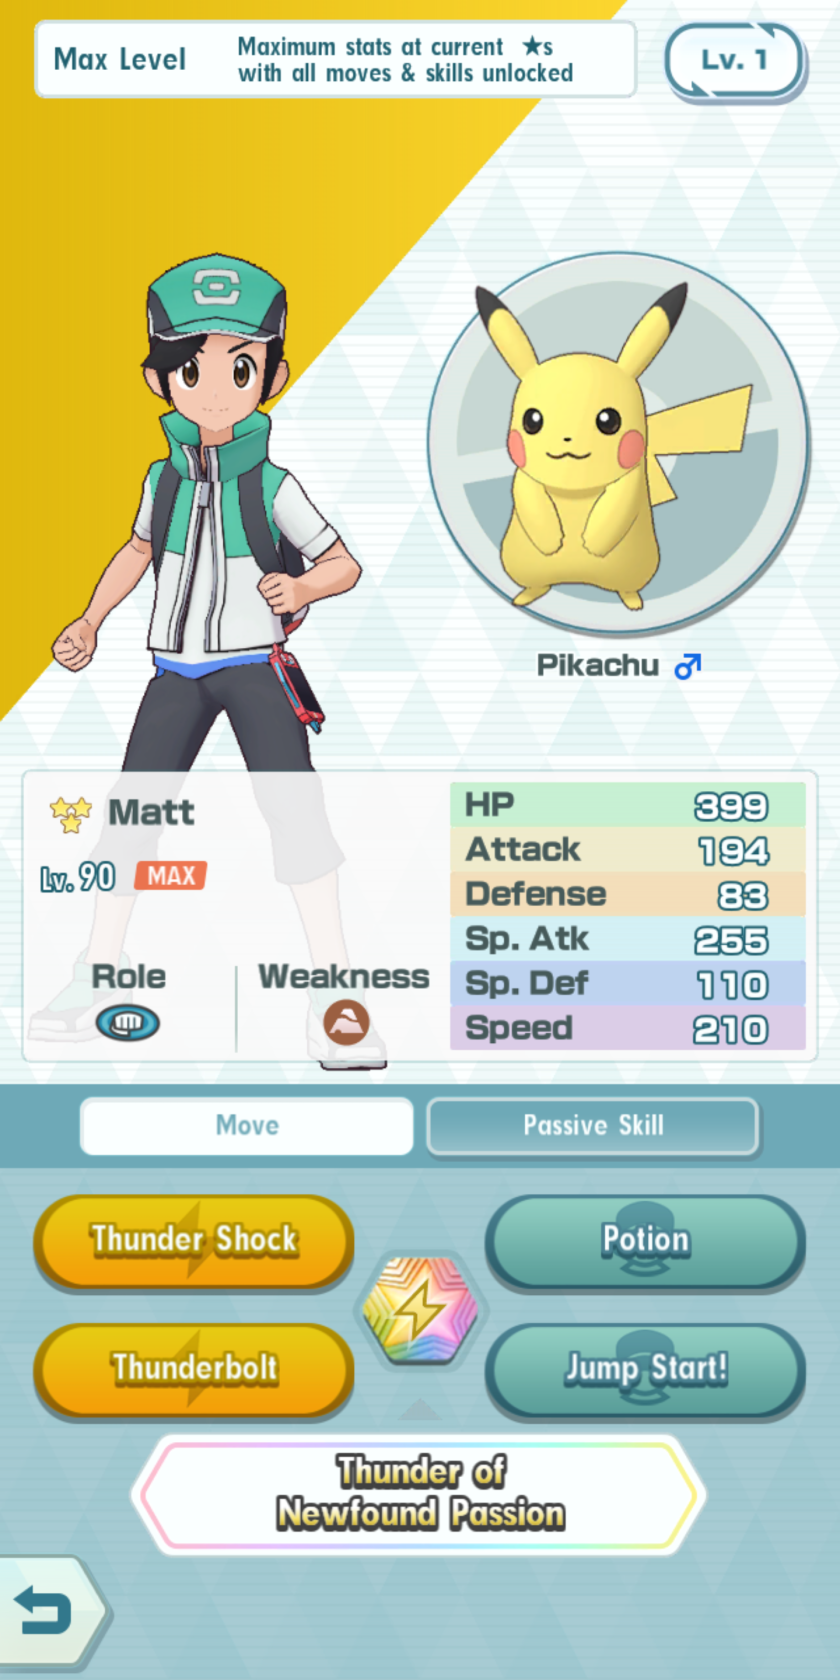
| Main Character & Pikachu |
 |
|
C Tier
C+ Strike
5* Sync Pairs
Silver & Ho-Oh
Fantina & Mismagius
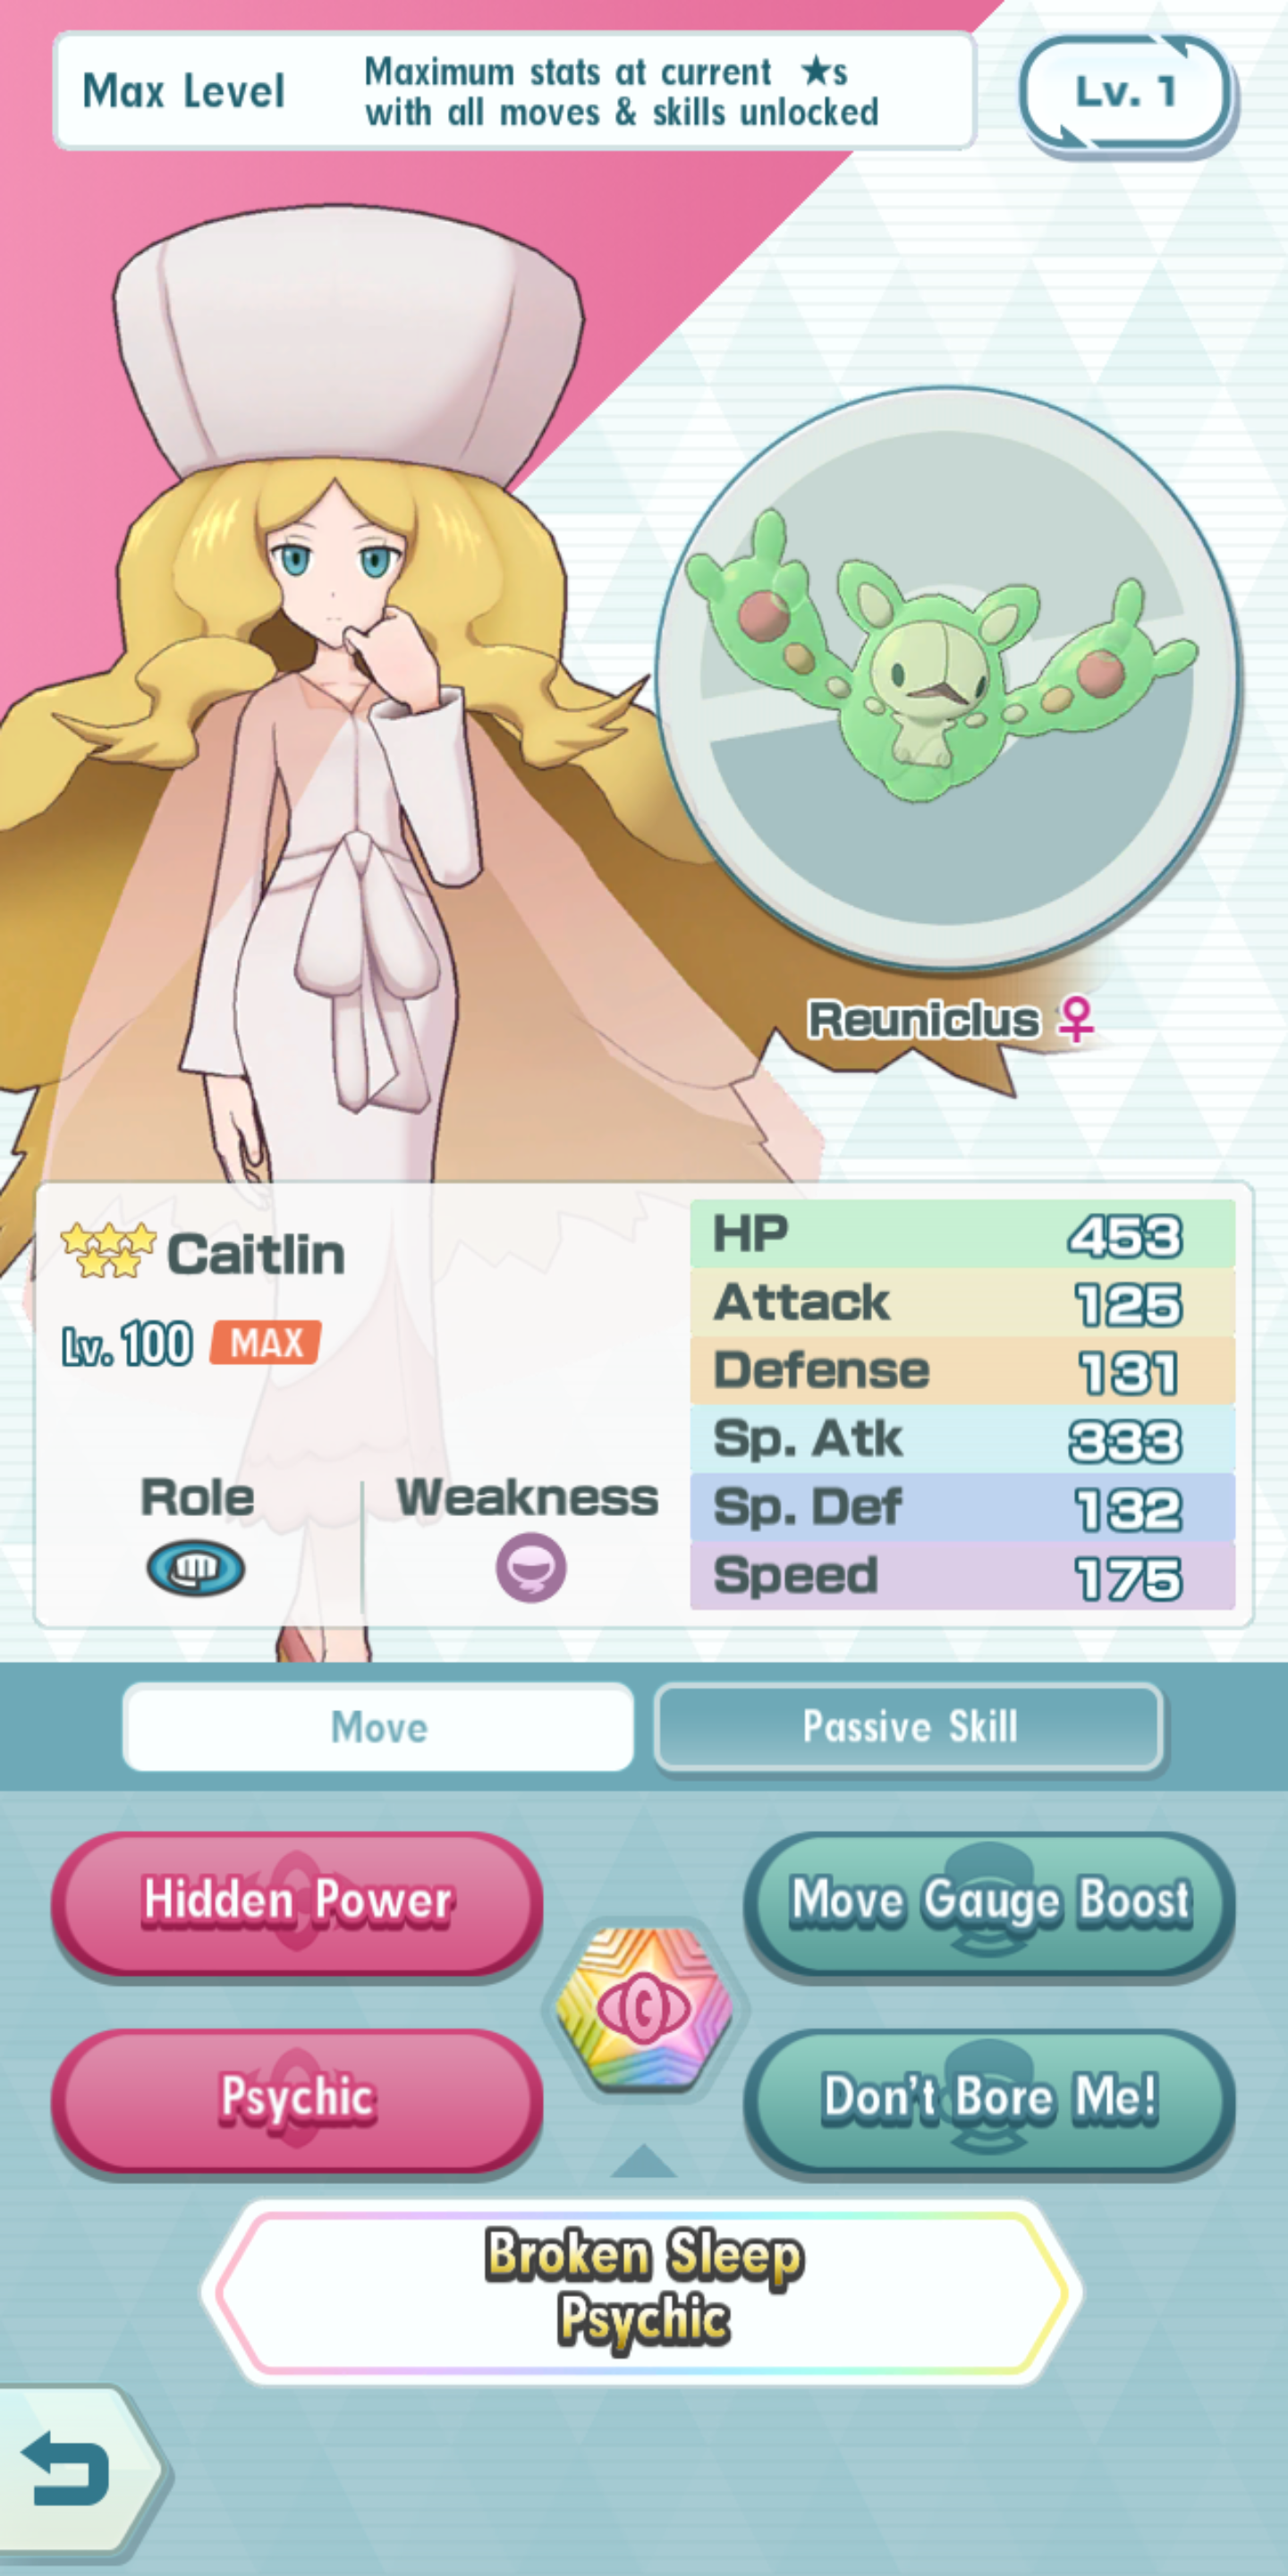
| Caitlin & Reuniclus |
 |
|
C- Strike
4* Sync Pairs
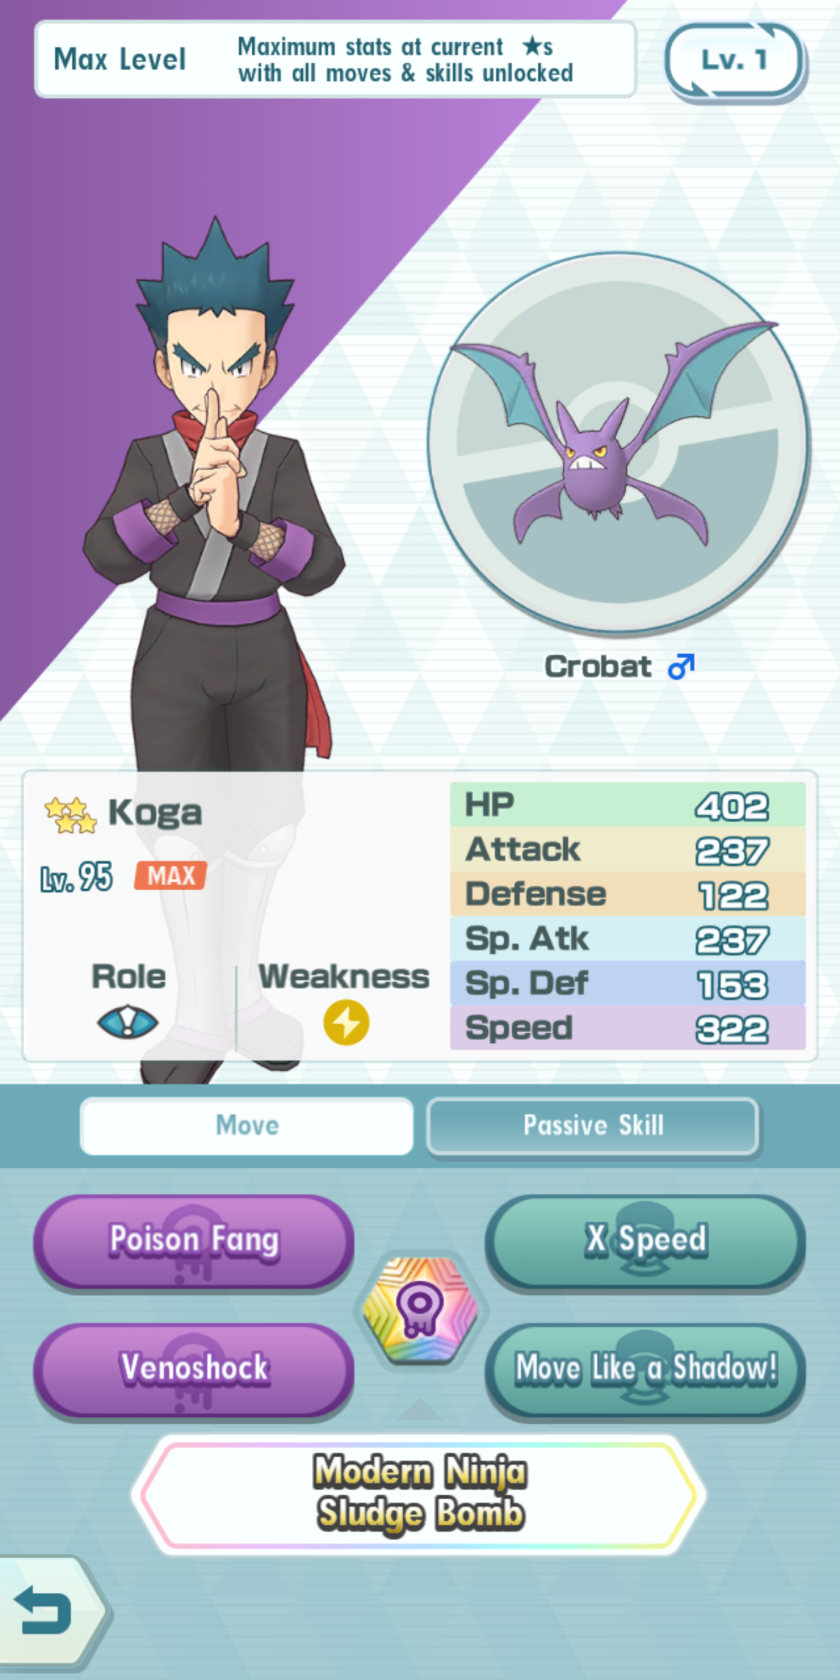
| Koga & Crobat |
 |
|
| Bruno & Machamp |
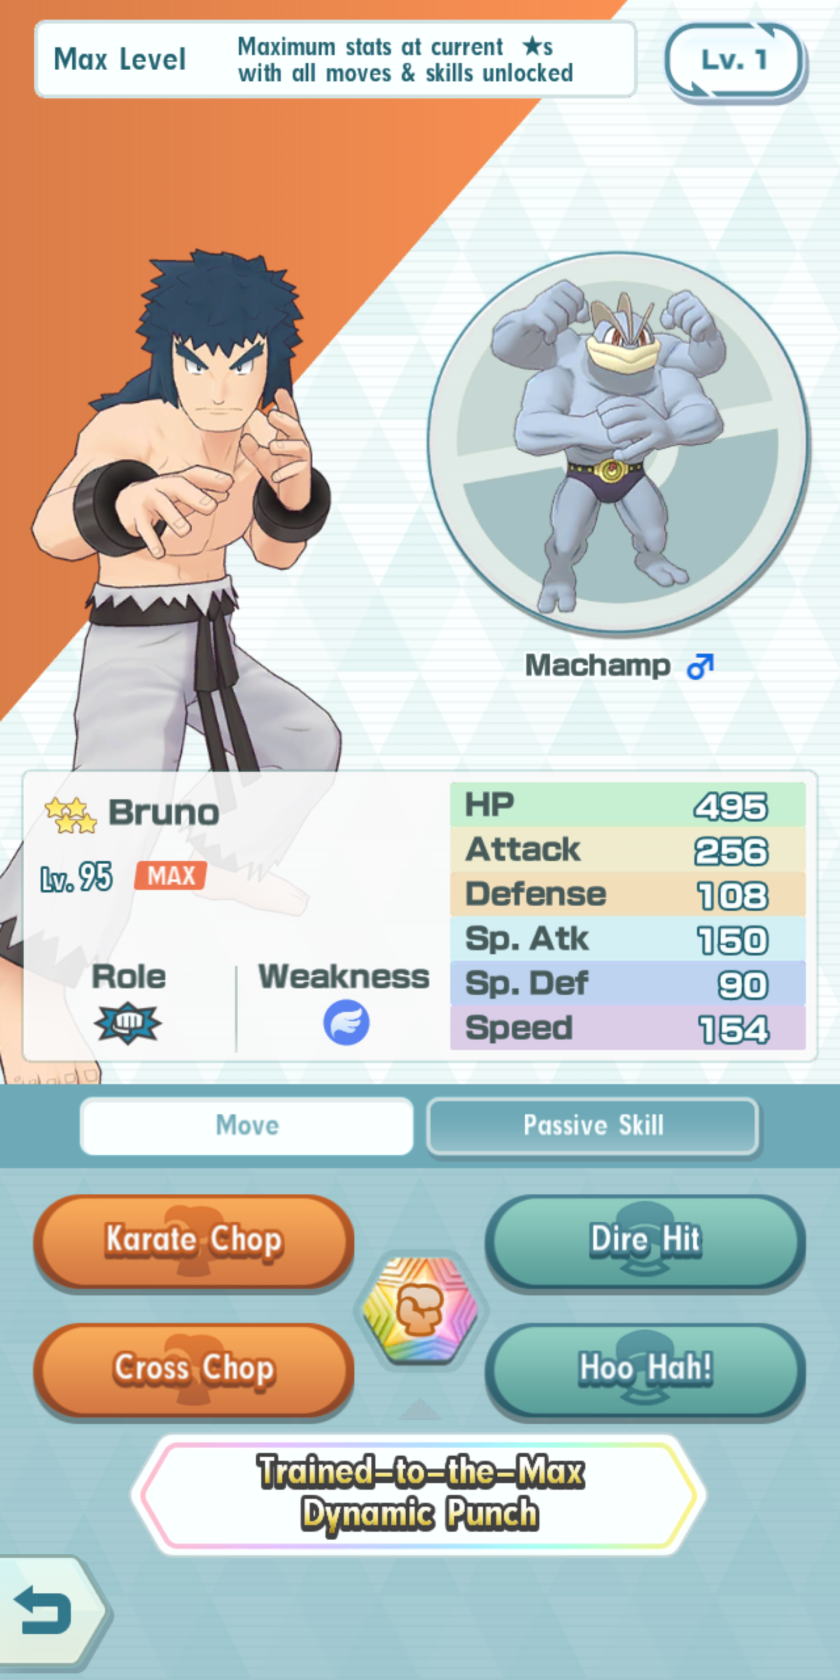 |
|
| Siebold & Clawitzer |
 |
|
| Wikstrom & Aegislash |


|
|
C- Support
5* Sync Pairs
Wallace & Milotic
4* Sync Pairs
| Blaine & Ponyta |
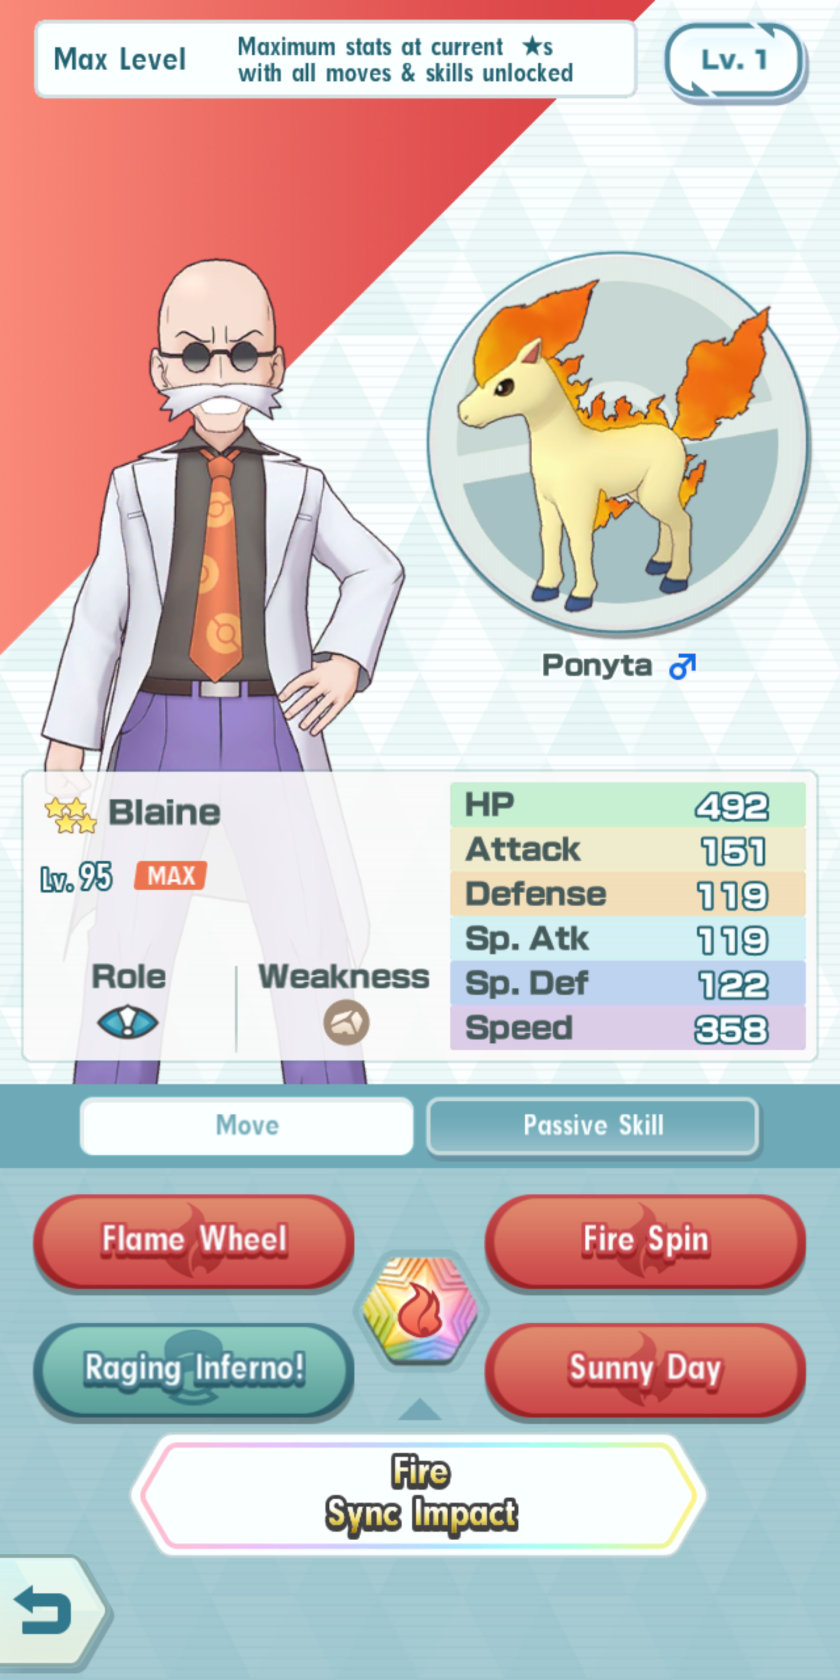 |
|
| Thorton & Bronzong |
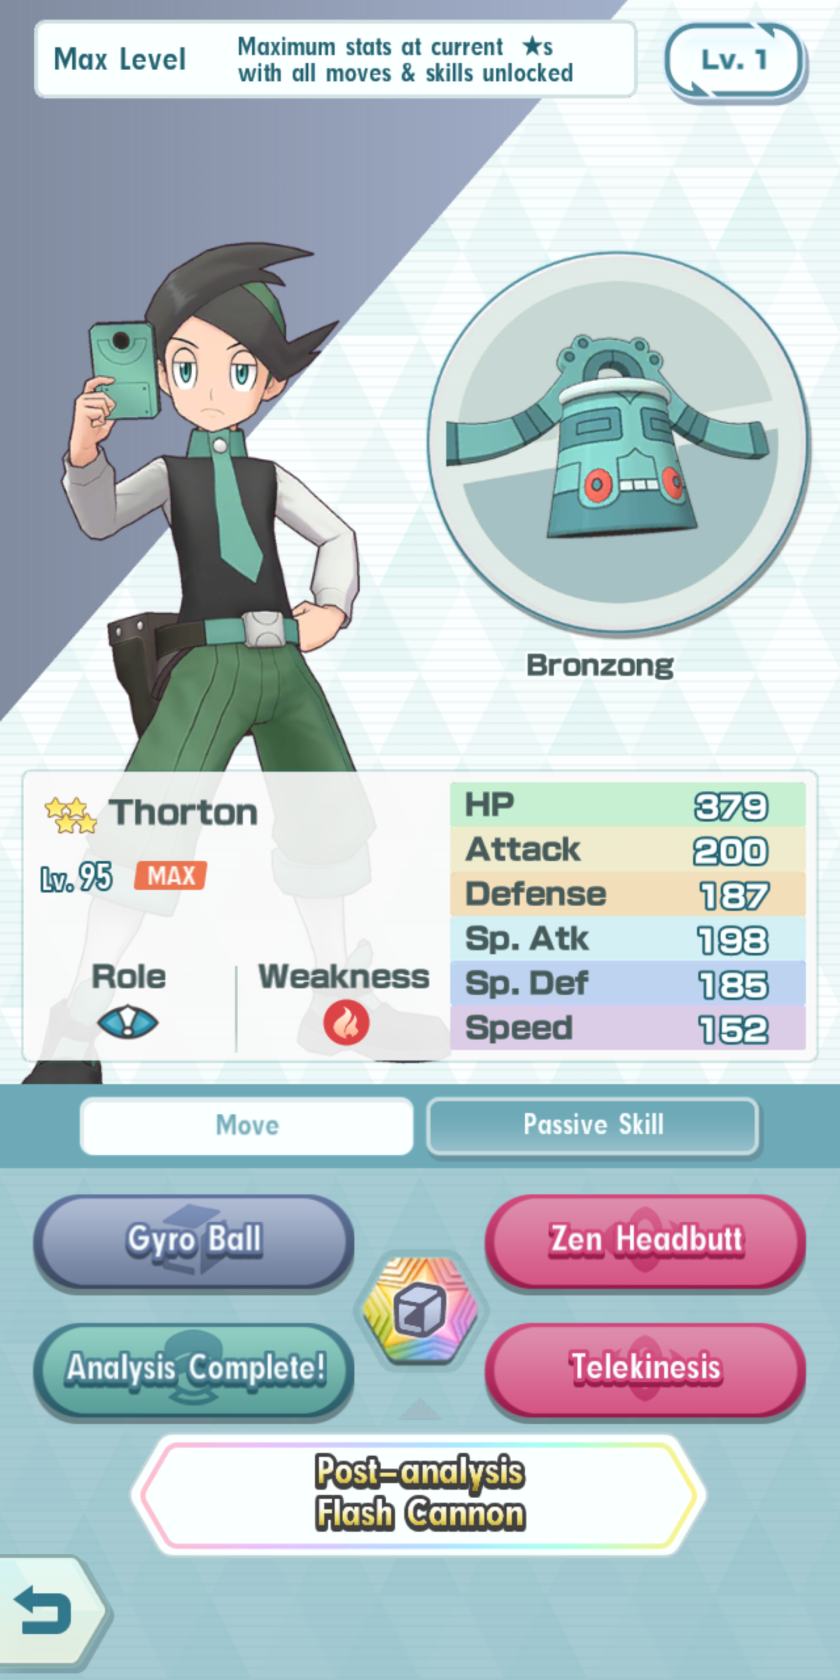 |
|
3* Sync Pairs
| Brawly & Makuhita – Hariyama |


|
|
C BorderLine
5* Sync Pairs
Zinnia & Rayquaza
3* Sync Pairs
| Norman & Slaking |
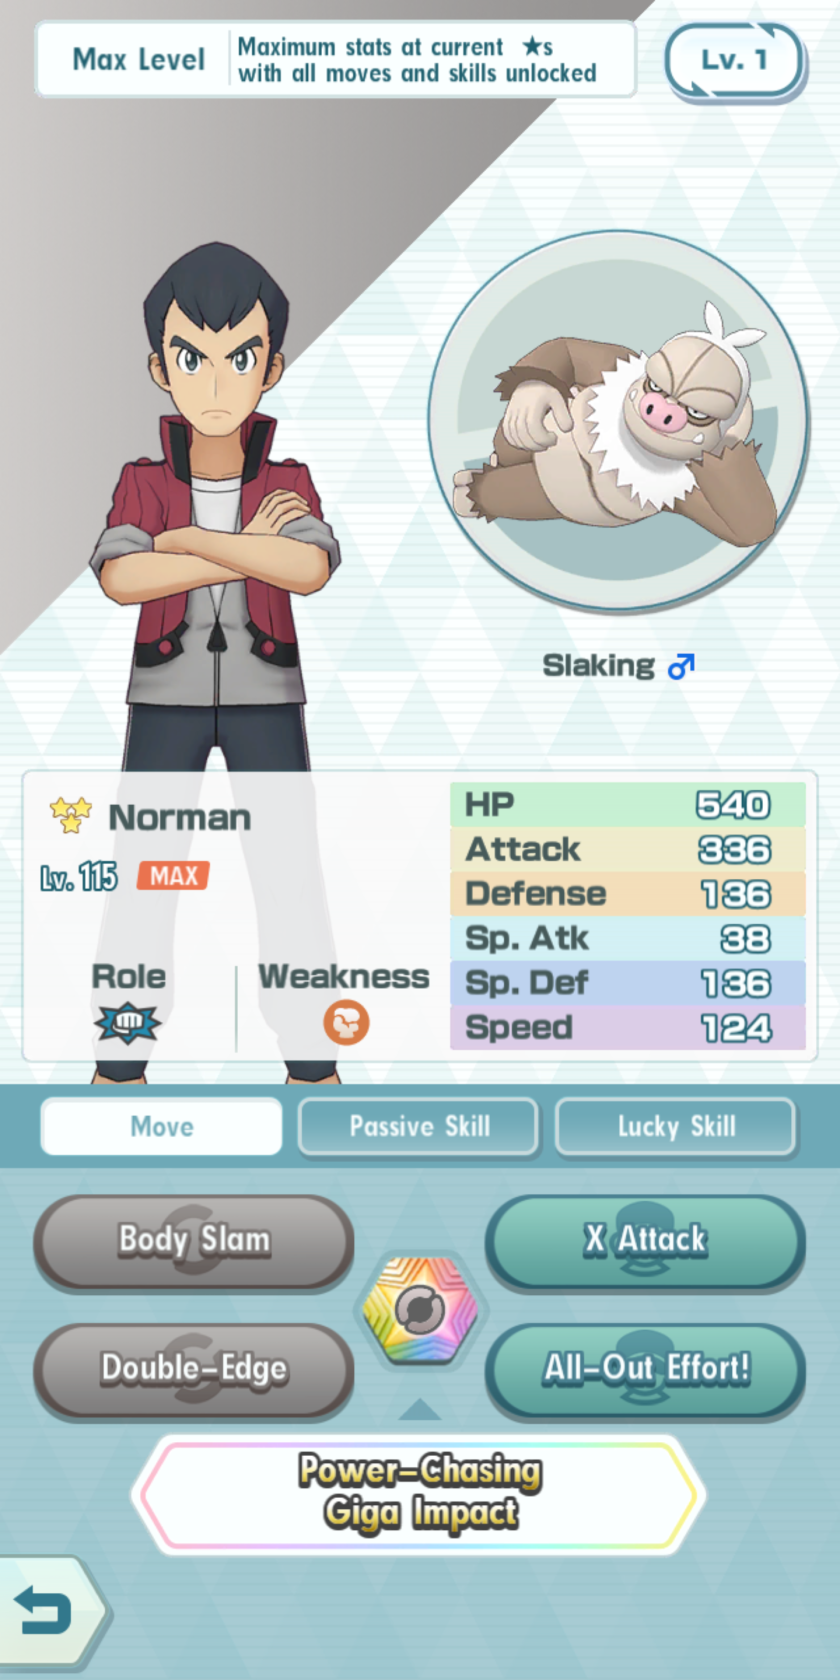 |
|
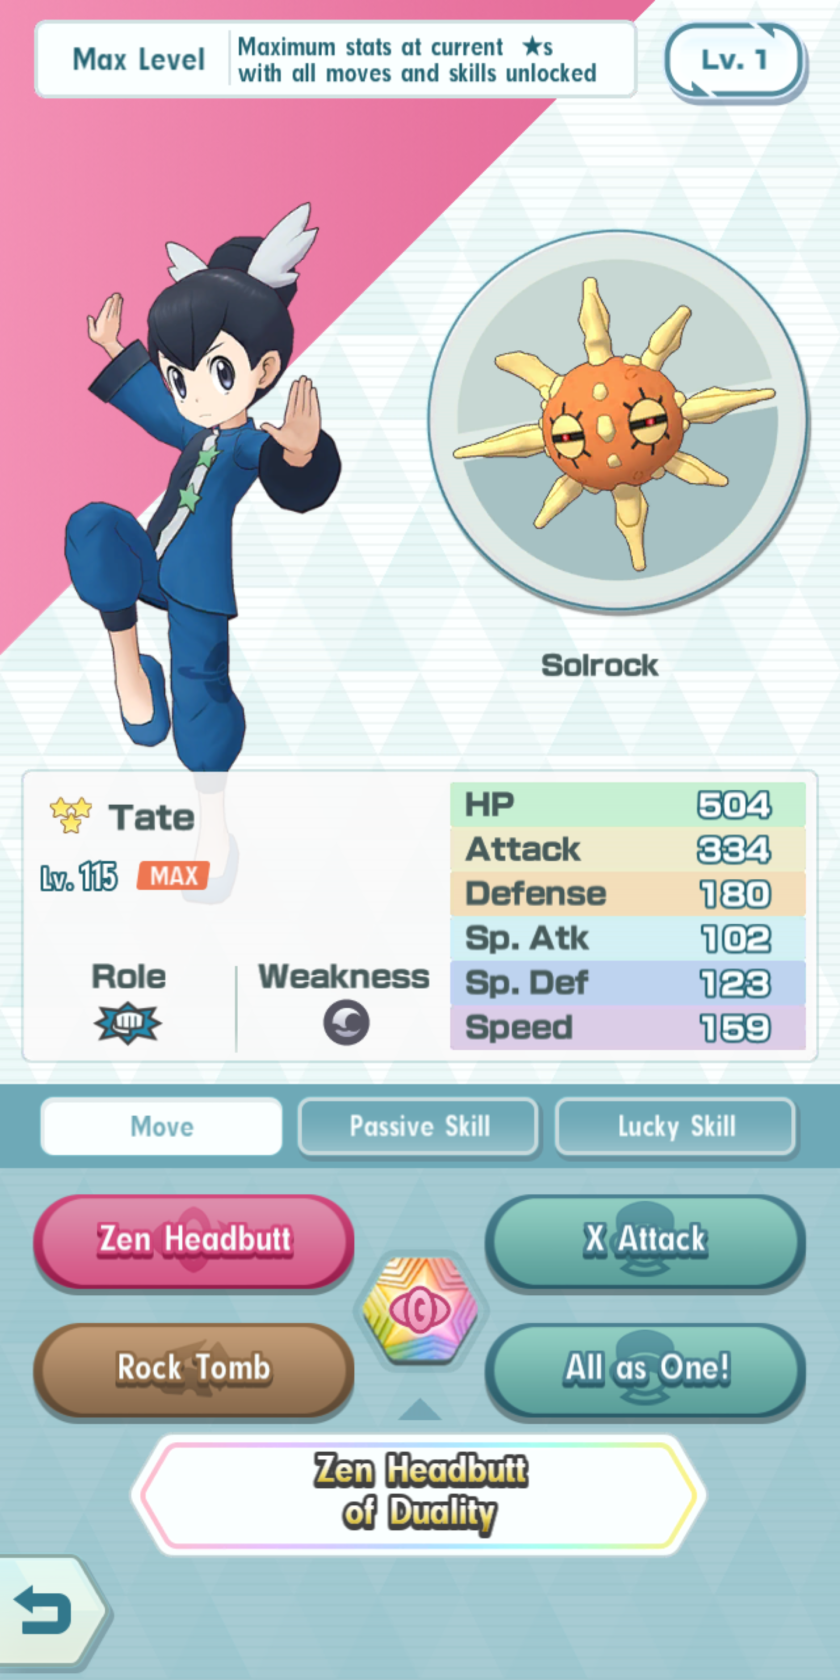
| Tate & Solrock |
 |
|
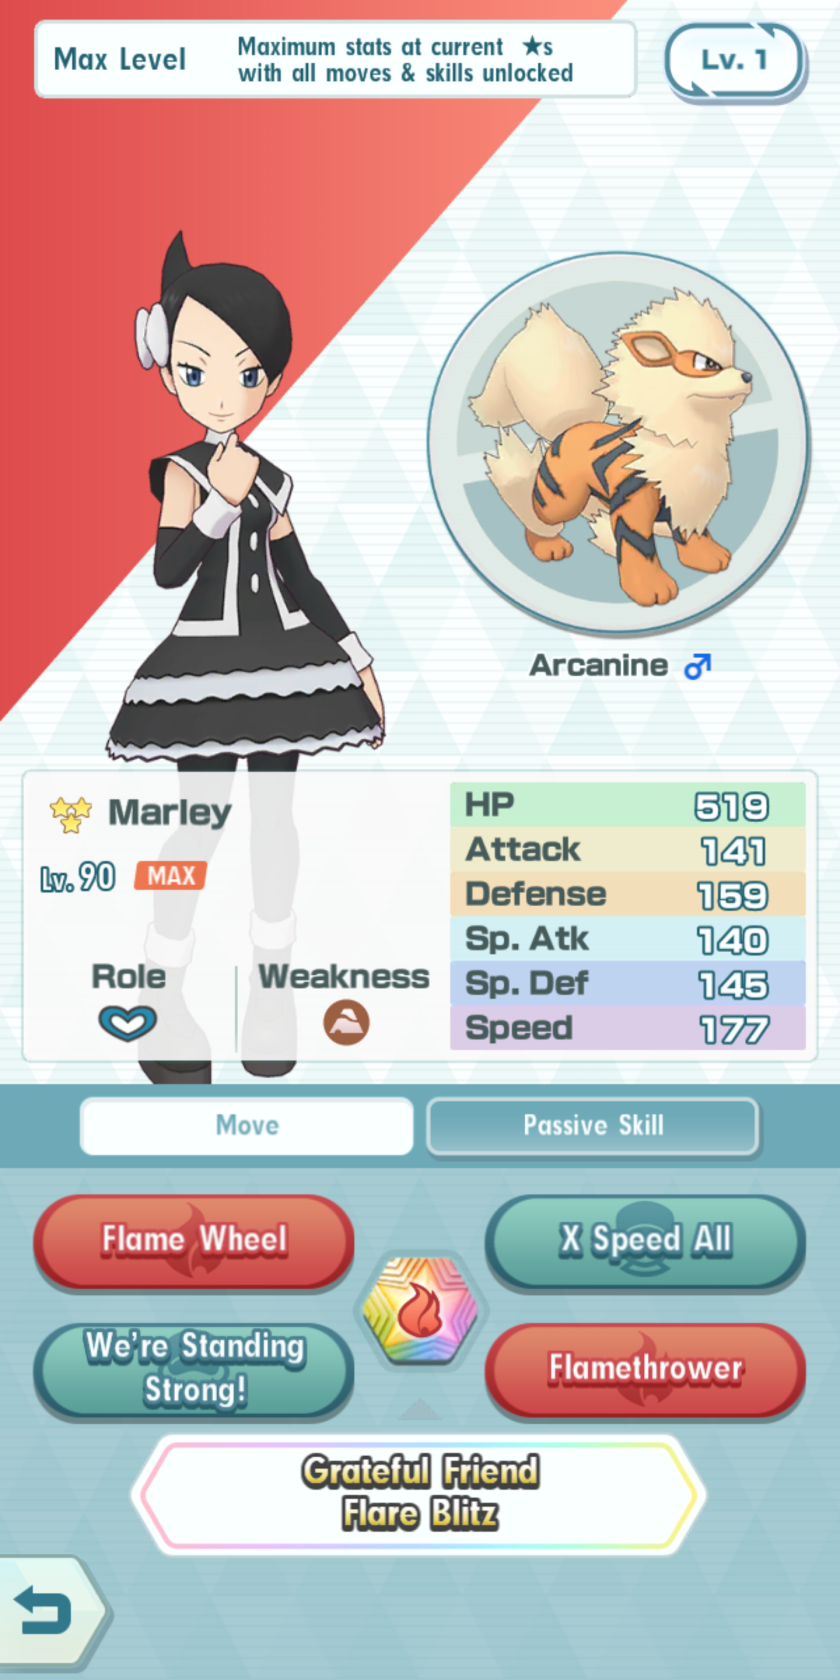
| Marley & Arcanine |
 |
|
Honorable Mentions
5* Sync Pairs
Ethan & Cyndaquil – Quilava – Typhlosion
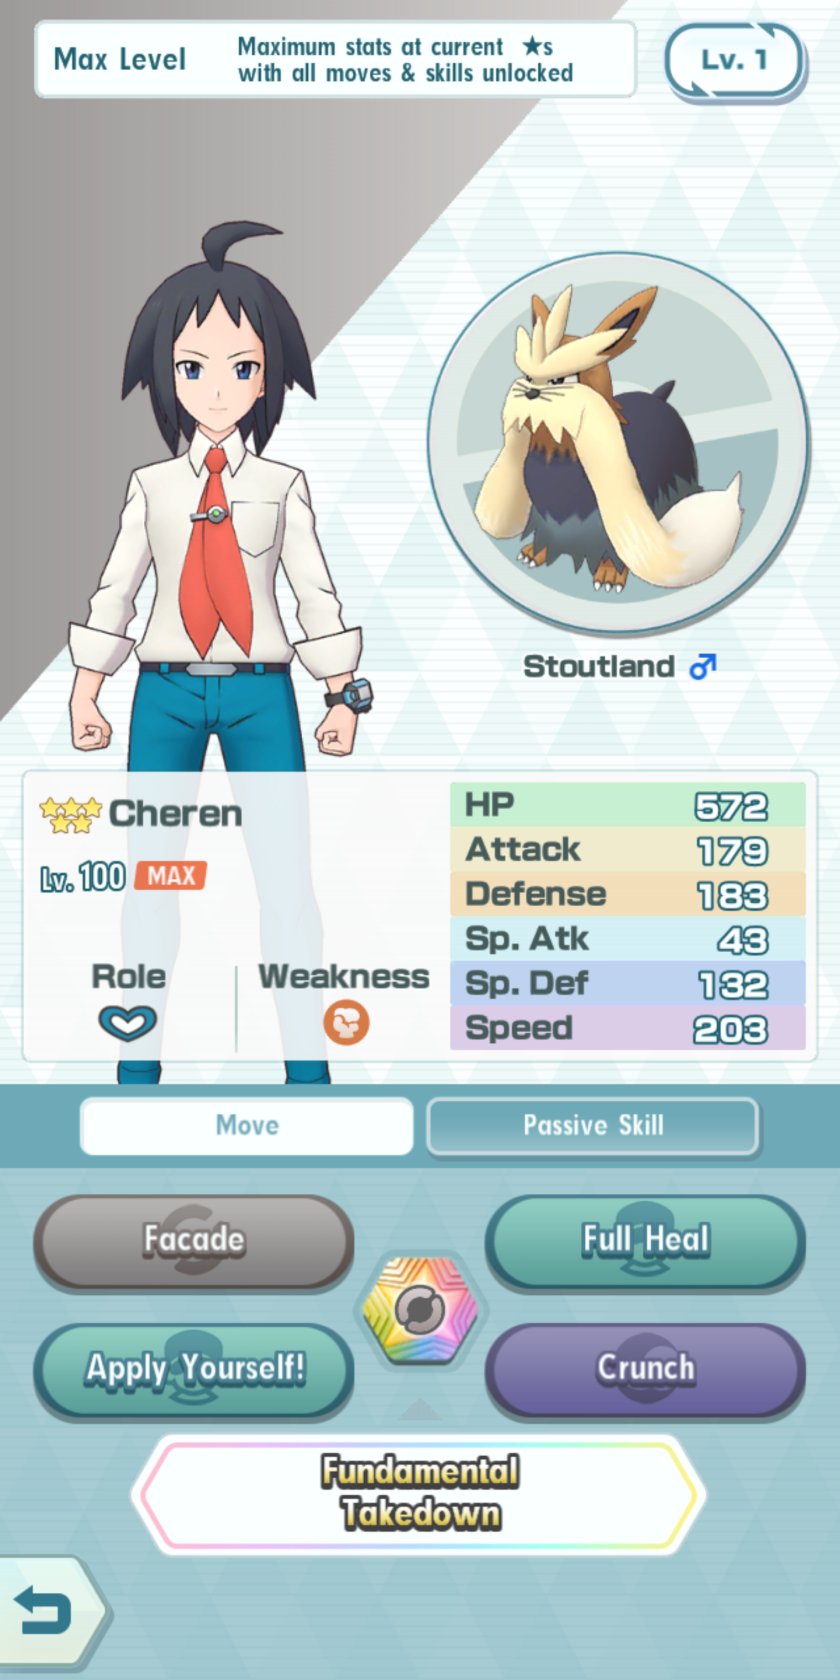
| Cheren & Stoutland |
 |
|
4* Sync Pairs
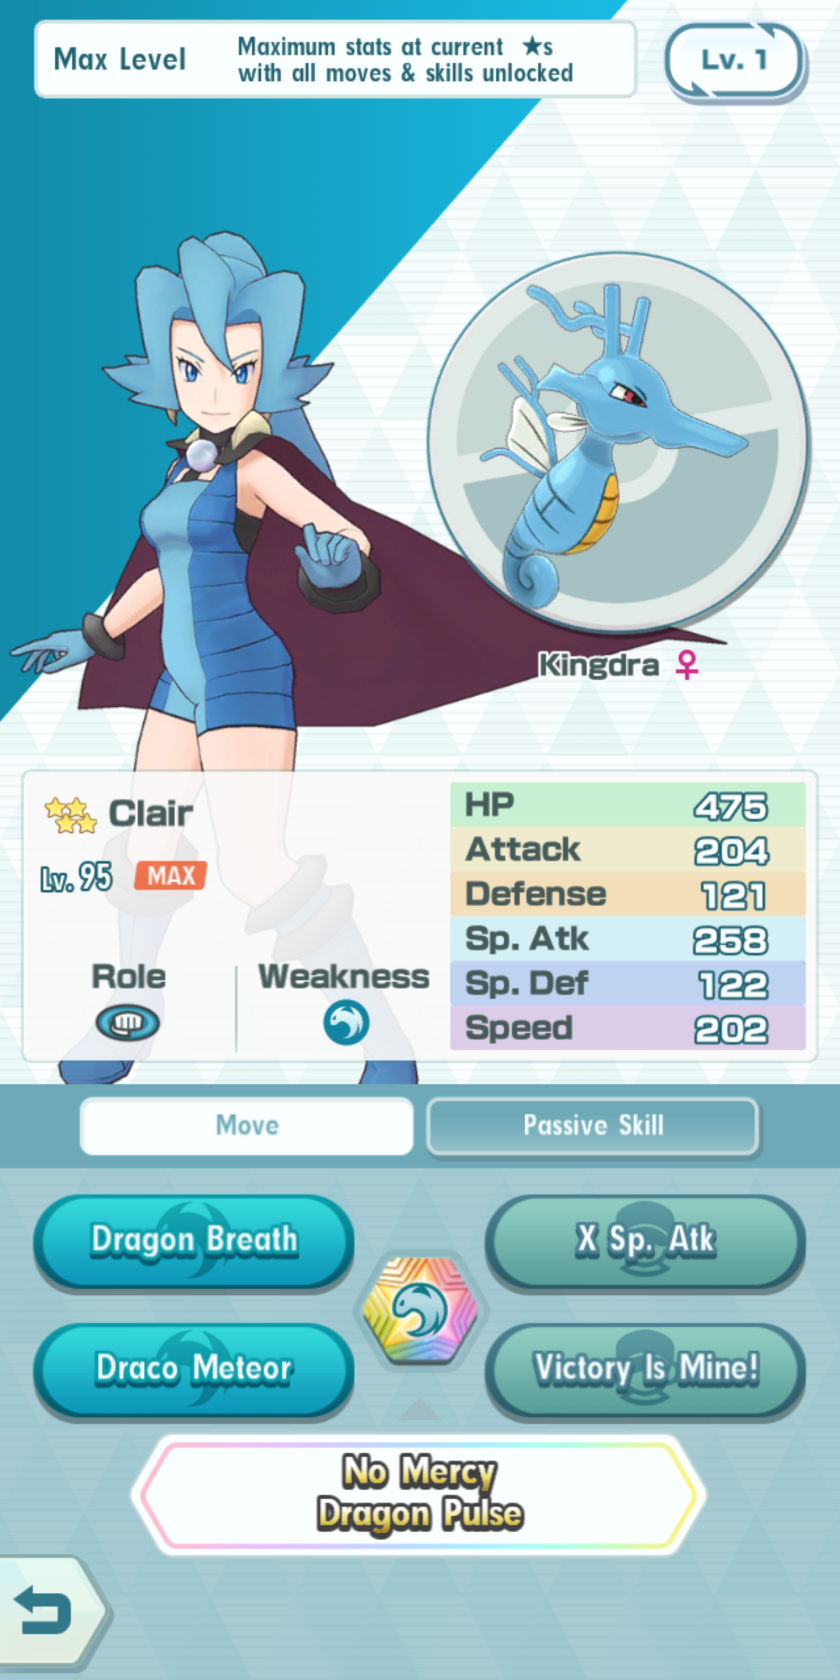
| Clair & Kingdra |
 |
|
3* Sync Pairs
| Crasher Wake & Floatzel |
 |
|
