
NOTE: The newest rendition of the Tier List is currently located here, with updated ranking criteria and a more simplified and user-friendly structure.
This older rendition will remain online for archival purposes until traffic necessitates otherwise.
Greetings!
Welcome to MYSE’s Pokemon Masters EX Tier List.
This Tier List evaluates Sync Pairs across all roles, across all stages of the game:
- Early Game Exploration (Single Player)
- Free to Play Sync Pairs and Sync Pairs that have strong AOE moves fare well in this phase.
- Mid Game Gear Farming (Co-Op)
- Sync Pairs that fare well in Co-Op and the best performing Sync Pairs of each Type fare well in this phase.
- Mid Game Battle Villa Grinding
- The best performing Sync Pairs of each Type and Sync Pairs that draw most of their power from their Sync Grid fare well in this phase.
- Late Game Full Force Battle and Legendary Arena Challenges (Single Player)
- Top Enablers and Damage Dealers of each Type fare well in this phase.
To this end, Strike Sync Pairs are rated largely on their replaceability in their Type alignment. As a result, scarcity becomes an influential determinant of one’s placement. Likewise, certain Sync Pairs will be penalized if there are multiple and/or better alternatives in their respective Type. This applies even if the candidates perform different roles.
Another key factor for consideration is the availability of each Sync Pair. This mainly affects PokeFair exclusive candidates. While these banners are generally the best to invest in, their strict window(s) of availability makes them harder to acquire for newer players.
While this is a combined Tier List, the offensive and supportive Sync Pairs are still rated separately and housed in separate sub tiers. Because of the sheer volume of Sync Pairs that this would create, this Tier List will focus on Sync Pairs that are largely self-sustainable. Hence, not all Sync Pairs will be featured here. This does not by any means imply that the unlisted Sync Pairs are worthless. Players are still encouraged to use their favorite Sync Pairs and use this Tier List to identify a suitable core to build their roster with.
Sync Pairs that have similar sets, structures, and/or roles are placed next to each other as much as possible.
This article covers the current rendition of the Tier List, last updated on 2021-02-27.
A newer, simplified Tier List with a better explanation of ranking guidelines is now live. In the meantime, the preliminary rankings of the rated Sync Pairs for March 2021 are as follows:
Champion Iris: Premier BL
Diantha: Premier BL
Leon: Premier BL
Marnie: C BL or C/D
Premier Tier
*** This tier houses the cream of the crop. Players can use any Sync Pair listed in this tier and expect stellar returns. ***
Strike

Sygna Suit Red & Charizard (MX)
Sygna Suit Red is the best Strike Sync Pair in the game. He effectively combines the best attributes of Brendan and Cynthia, improving further on this potent mixture, while not being burdened by the duo’s set limitations. Charizard is not particularly dependent on Sygna Suit Red’s Sync Grid, though it does synergize well with Sun’s natural power boost to Fire Type moves. Note: Sygna Suit Red is only available during his Poke Fair Banner. Considering that he is not a guaranteed Gacha roll in that limited event, newer players might find it hard to obtain this Sync Pair. |
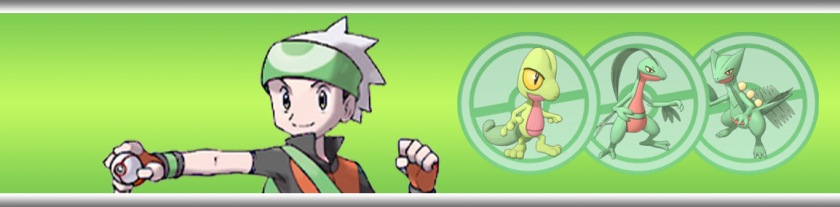
Brendan & Treecko – Grovyle – Sceptile
Brendan is the ultimate self-sufficient unit, capable of maxing its own Speed, Critical hit rate, and both offenses. Like Sygna Suit Red, Brendan isn’t dependent on his Sync Grid to perform, though it does open up new avenues of team composition through Sun based nodes. As a Grass Type Sync Pair, Brendan enjoys Type Skill buff when paired with Sygna Suit Leaf, Lyra, and/or Dawn. Note: Treecko is on par with other 5 Star Sync Pairs, so players can opt to evolve other Sync Pairs first without having to worry much about damage output. |
May & Mudkip – Marshtomp – Swampert (M)
Swampert is self-sufficient, setting up the Rain that it relies upon. This allows it to straddle both offensive and supportive duties with ease. May is also notable for being the only viable Ground Type damage dealer outside of Cynthia, which bolsters her stock for newer players. |

Sygna Suit Cynthia & Kommo-O
Sygna Suit Cynthia, while outclassed by her Sinnohan counterpart in both boost time and damage ceiling, still has a very useful niche that puts her a class above the rest: High Five 1. Having two instances of this skill allows her to maximize her main stats within 3 Sync Moves. This makes her highly self-sufficient and better built for longer battles like in the Legendary Arena and Full Force Battles. Note: Sygna Suit Cynthia is only available during her Poke Fair Banner. Considering that she is not a guaranteed Gacha roll in that limited event, newer players might find it hard to obtain this Sync Pair. |
Support

Sygna Suit Leaf & Venusaur (M)
Sygna Suit Leaf is the best Tech Sync Pair in the game. The combination of Sundering 9, Venomous 4, and Razor Leaf turns her into the top wall destroyer for most stages. Her Sync Grid buffs the effectiveness of her defensive tools greatly, like Potion Master Healer, Healing Sun, and Discourage 1. Note: Sygna Suit Leaf is only available during her Poke Fair Banner. Considering that she is not a guaranteed Gacha roll in that limited event, newer players might find it hard to obtain this Sync Pair. |

Sygna Suit Blue & Blastoise (M)
Sygna Suit Blue is the best Support Sync Pair in the game, after DeNA improved his Sync Grid in an unprecedented move. He is the only Sync Pair that is capable of healing without exhausting Move Points. This, combined with Team Shout 9, allows players to pair Sygna Suit Blue with virtually any striker. Note: Sygna Suit Blue is only available during his Poke Fair Banner. Considering that he is not a guaranteed Gacha roll in that limited event, newer players might find it hard to obtain this Sync Pair. |

Sygna Suit Elesa & Rotom
Sygna Suit Elesa and Sabrina are the two best Support Sync Pairs for Special Strike cores. While she doesn’t offer as much utility as Sabrina, Sygna Suit Elesa offers nigh unmatchable longevity through Look Alive 9 and Ridicure 2 from her Sync Grid. |

Skyla & Swanna
Skyla’s Sync Grid makes her the game’s best healer, which is essential in longer matches like the Battle Villa and Full Force Battles. The fact that players get her for free pretty early in the game has seen to the skyrocketing of her stock. Aside from Potion, she can also team buff Defense and Speed, the latter an exceptionally underrated asset. She performs best as the second Support unit, keeping the bulkier offensive support alive. |
Premier BorderLine
Gloria & Zacian
|
|
A Tier
*** This tier houses the Sync Pair that have high overall utility and self-sustenance. They are either the highest damage dealer of their respective Type (for Strike Sync Pairs) or the best Support Sync Pairs that aren’t as all-encompassing as those in the Premier Tier. ***
A+ Strike [Mega]
Blue & Pidgeot (M)
Blue and Pidgeot served as one of the two OGs for Unity Grinding, requiring only one turn of setting up to start churning out Critical Hits through his AOE move, Air Cutter. As the more offensive variant, Pidgeot covers Hurricane’s poor accuracy on his own to make it a great Mega Striker. |
Karen & Houndoom (M)
Karen and Houndoom served as one of the two OGs for Unity Grinding, requiring only one turn of setting up to start churning out Critical Hits through her AOE move, Snarl. As the more defensive variant, Houndoom saw a decent buff through status powered nodes on its owner’s Sync Grid. |
Wally & Gallade (M)
Wally is unique as his Gallade is the one Mega Evolution enabled Pokemon that actually lives up to the title of a Mixed sweeper. His Sync Grid centers around dealing fast and boosted Critical Hit damage, which pairs extremely well with Gallade’s natural access to Critical Hit Rate boosts. Note: Players can choose to run Enlightenment 9 as Gallade’s Lucky Skill to eliminate the need to run Close Combat: Stat’s Quo 4 in longer battles. |
Cynthia & Garchomp (M)
Garchomp’s entire set revolves around Sand, from its Passive Skills to its owner’s Sync Grid. Surging Sand, therefore, becomes a powerful Lucky Skill for Garchomp to fully dominate under the favorable Weather condition. Note: Cynthia is only available during her Poke Fair Banner. Considering that she is not a guaranteed Gacha roll in that limited event, newer players might find it hard to obtain this Sync Pair. |
A- Strike [No Mega]
Lance & Dragonite
Dragonite’s Dragon Shift elevated Hyper Beam, which, while draining its Move Gauge heavily, hits for a ridiculously high amount of damage. His Sync Grid grants him multiple useful tools, like Healthy Healing, Hyper Beam Accuracy +10, as well as a bunch of Move Gauge Refill support. Note: Lance is only available during his Poke Fair Banner. Considering that he is not a guaranteed Gacha roll in that limited event, newer players might find it hard to obtain this Sync Pair. |
Wallace & Milotic
Wallace’s status as a Tech unit allows him to straddle both offensive and defensive roles. When built as a strike option, his Milotic’s maximum damage output outstrips that of Kris’ Feraligatr. Conversely, Milotic can also be built to be an undying attack sponge through a more regenerative build. |
Alder & Volcarona
Alder is one of the most beginner-friendly powerhouses in-game that provides self-sustenance, massive damage output, and team utility. Alder is also notable for his Sync Grid independence, meaning players can get results even if they only have 1 copy of him. Note: Alder is only available during his Poke Fair Banner. Considering that he is not a guaranteed Gacha roll in that limited event, newer players might find it hard to obtain this Sync Pair. |
N & Zekrom |
A Support
Sabrina & Alakazam (M)
As standalone units, Sabrina and Sygna Suit Elesa are the two best Support Sync Pairs for Special Strike cores. Through the variety of buffs that Sabrina offers, it condenses three best 3 Star Support Sync Pairs (Torchic, Probopass, and Swanna) into one single unit. |
Lyra & Chikorita – Bayleef – Meganium
Lyra and her Meganium are absolute necessities for Sun cores, thanks to her obtaining Solarize from her Sync Grid. However, this also means that she would have likely exhausted some if not all of her boosting Move Points by that point in time. Fortunately, it can be mitigated through Move Point Refresh, so the drawback isn’t as critical. NOTE: Using Lyra and Sygna Suit Leaf on the same team activates both of their Type Skills, which helps increase the HP of both Pokemon. |
Serena & Fennekin – Braixen – Delphox
Agatha, but much better, thanks to Delphox’s Passive Skill, which allows it to hypnotize all 3 foes simultaneously. This turns her into an absolute necessity for no damage team builds, since she can continuously reapply Sleep through Hypnosis, which does not cost Move Gauge points. Her main drawback lies not in her set, but in the conflict between Sleep and Poison brought about by the release of Sygna Suit Leaf. |
Lillie & Clefairy |
A BorderLine
Hilbert & Oshawott – Dewott – Samurott
Hilbert retains his place as the game’s premier pure Physical support, especially so after his upcoming Sync Grid. Additionally, it is actually pretty decent as a makeshift Water Type Striker, if players do not have better options like May, Kris, or Cyrus. |
Hilbert (Fall 2020) & Mightyena
Note: Hilbert (Fall 2020) is only available during his Seasonal Banner. His naming convention suggests that he may no longer return, which means that newer players might never be able to obtain this Sync Pair. |
| Professor Sycamore & Xerneas
Best free support Sync Pair in the game. |
Lysandre & Yveltal |
B Tier
*** This tier houses the Sync Pairs that, while powerful, either need more support than their brethren above or aren’t as metagame influencing within their Type allocation. ***
B+ Strike
Hilda & Tepig – Pignite – Emboar
Hilda is a ferocious Strike unit in her own right, arguably the inverse of Cyrus. This is because her Emboar’s damage output is remarkably high despite lacking access to Critical Hit Rate boosts until it reaches pinch. This makes her a fantastic pick for stages where the enemy units carry Vigilance. The introduction of her Sync Grid patched up the problems caused by hefty recoil, as well as gave her Master Healer to keep her alive for even longer. However, as a Fire Type Strike Unit, she faces stiff competition from the likes of Sygna Suit Red, as well as free options like Flannery and even Flint. |
Elesa & Zebstrika
Elesa largely operates like Hilda, just without the access to a Weather Boost. However, she does have a slight reprieve in the fact that there aren’t many good Electric Strike units in the game, which elevates her importance in the game. |
| Lisia & Altaria (M) | Olivia & Lycanroc (Midnight)
One of the OG 5 Star Sync Pairs, Olivia came into the game as the best Co-Op powerhouse, and no one truly matches the effectiveness of her skillset in Co-Op. As the metagame developed, her importance as the go-to Rock Type Strike Sync Pair has diminished. Yet, she is still fantastic as a secondary Strike option on Sandstorm cores, thanks to her high self-sustainability. |
B- Strike
Giovanni & Mewtwo
Giovanni & Mewtwo’s biggest selling point is that it has Mega-esque Base Special Attack while being a regular (Legendary) Pokemon. This allows it to start nuking from the get go, despite requiring team support for Special Attack boosts. It is also notable for hitting from two Types (Psychic and Ghost), making him a fantastic asset for the casual players with a limited roster. However, the ensuing power creep since his introduction and his persistent lack of a Sync Grid has seen his stock fall from a dizzying height. Note: Giovanni is only available during his Story Event. Considering that we already had a repeat run, it may be quite a while before newer players can get their hands on this Sync Pair. |
Cyrus & Palkia
Cyrus’s Palkia is one of the most obscene strikers thanks to Critical Strike 9, which grants a huge power boost to Critical Hits. Both Spacial Rend and Emotional Void Spacial Rend have an in-built +1 Critical Hit rate, so players only need one use of Dire Hit + All to unleash this behemoth. Note: Cyrus is only available during his Story Event. Considering that his Event period just ended, it may be quite a while before newer players can get their hands on this Sync Pair. |
Steven Stone & Metagross (M)
Steven Stone’s Metagross is one of the most all-rounded Strike Sync Pairs, with Quick Moves after Mega Evolution helping it maintain damage output while the Move Gauge refills. Players are highly recommended to invest heavily in his Sync Grid, on nodes like Haymaker and Bullet Punch: Eagle Eye 9. His lower placement on this Tier List is largely due to his relatively low availability, which is a shame considering his fantastic set. Note: Players can invest in other Sync Grid nodes to maximize Metagross’ longevity, like Stoic 2, Recuperation 2, and Force Field 1, with the latter having a small chance to buff the team’s Special Defense per attack. Note: Steven Stone is only available during his Poke Fair Banner. Considering that he is not a guaranteed Gacha roll in that limited event, newer players might it hard to obtain this Sync Pair. |
Steven Stone (Summer 2020) & Alolan Sandslash
Alolan Sandslash acts as the combination of Silver, Cynthia, and Guzma to become the best Hail setter and Ice Type Strike Sync Pair in the metagame. It is incredibly self-sufficient, with No Quarter and Hasty Hail greatly amplifying its momentum. Note: Players can turn Alolan Sandslash into a Freeze Tech through Iclce Spear: Cold Snap 2, which then triggers Freezer Burn 5. Note: Steven Stone (Summer 2020) is only available during his Seasonal Banner. His naming convention suggests that he may no longer return, which means that newer players might never be able to obtain this Sync Pair. |
B Support
Jasmine & Steelix (M)
Jasmine’s Steelix can be seen as the more defensive counterpart to Glacia, both Mega Support martyrs. It is usually harder to trigger Last Word on Mega Steelix, however, if players run Recuperation 2.
|
Phoebe & Dusclops – Dusknoir
As one of the OG 5 Star Sync Pairs, Phoebe quickly established herself as an irreplaceable support powerhouse due to her exclusive Dire Hit All + and Dusknoir’s good bulk. Both Defense Crush 2 and Stoic 2 are valuable Lucky Skills that Dusknoir can adopt to deal more or take less Physical damage respectively. Note: Phoebe’s utility is exhibited fully in Co-Op battles, where half of her Dusknoir’s accumulated boosts are passed to its replacement when it is KOed. |
Glacia & Glalie (M)
The introduction of the Lucky Skill mechanic has turned Glacia’s Glalie into the game’s best martyr unit, adding to its role as a regenerative damage redirector. She is rather useful at sneaking in a cheap hit through the AOE Powder Snow, which has a small chance to freeze the target. |
Dawn & Turtwig – Grotle – Torterra
Dawn is the best burst healer due to her “Full Restore”, even if there is currently no way to extend its singular use. She makes up for it with Torterra’s impressive bulk and unmatchable Move Gauge recovery support. |
B BorderLine
Rosa & Snivy – Servine – Serperior
This free Sync Pair, available near the start of the game, serves as the Special variant of Hilbert. Through Time to Energize!: Selfless, Rosa can act as a manual damage redirector in Co-Op. The rest of her Sync Grid, despite being Sun centric, is markedly bland and ineffective considering Serperior’s pitiful Base Special Attack. |
Sygna Suit Grimsley & Sharpedo (M)
Sygna Suit Grimsley’s introduction made up for the severe lack of reliable Water Type strike options in the metagame. His Sharpedo is more powerful than Kris’ Feraligatr, with a Sync Grid that helps immensely in mitigating the HP recoil of his Trainer Move. |
Acerola & Palossand
Acerola is the only free Weather setter not locked behind an Event, and a fantastic one at that when players pair her with Sand abusers like Cynthia. Her Sync Grid helps immensely at mitigating her average bulk, which is even more important considering her role as a damage redirector. However, she is not rated higher largely because it is harder to fit her on other teams that do not utilize Sand ahead of options like Sygna Suit Blue, Jasmine, and Serena. |
Professor Oak & Mew
The loose offensive equivalent of Sygna Suit Elesa’s Rotom. Mew has a pretty fast and scarily powerful Sync Move that draws power from its owner’s Sync Grid, allowing it to push far into the Battle Villa without having to worry about Move Point exhaustion. |
C Tier
*** This Tier houses Sync Pairs that are decidedly above average. They are capable of delivering solid results but are mostly outclassed by other options in their specific roles. ***
C+ Strike
| Lyra (Summer 2020) & Jigglypuff | Fantina & Mismagius
Best Ghost Type Strike Sync Pair. |
| Bianca & Musharna
Best Psychic Type Strike Sync Pair (after Giovanni). Offers Psychic Terrain support, while being a massive upgrade on Will. |
Plumeria & Salazzle
Only 5 Star Poison Type Strike Sync Pair. However, she faces stiff competition from decent 4 Star alternatives like Koga, Lucy, and Roxie. |
C- Strike
MC & Solgaleo
Chibi Brendan, despite Solgaleo being a Legendary Pokemon. Yet, Solgaleo hits a lot harder and more consistently on the Physical spectrum as compared to Sceptile. It trades the ability to buff its own Critical Hit Rate for the ability to hit from 2 different Types. Note: Solgaleo is only available during its Story Event. Considering that we already had a repeat run, it may be quite a while before newer players can get their hands on this Sync Pair. |
Kris & Totodile – Croconaw – Feraligatr
Kris remains as one of the game’s premier Water Type Strike option since there aren’t many counterparts that can come close to her Feraligatr’s damage output. Her Sync Grid helped to slightly patch up Mega Kick’s horrible accuracy while raising Feraligatr’s damage cap through Haymaker. |
Flannery & Torkoal
Flannery saw her stock skyrocket with the introduction of the Sync Grid mechanism, turning her into a scarily powerful sweeper that, like Professor Oak & Mew, draws power from her Sync Grid instead of Trainer Moves. However, her set is prone to the quick accumulation of passive damage. |
Korrina & Lucario (M)
Korrina and Noland are rated extremely highly despite having better Gacha alternatives in their respective Types (in this case, Wally). This is because they are highly efficient on their own as stand-ins, which makes their improved counterparts less of a necessity. However, she is ranked lower than her comparison since Wally does roughly the same job but better. |
C Support
Leaf & Eevee
- 2 Use Potion
- 2 Use +2 Move Gauge Refill All, +2 Attack
- Endless Possibilities Extreme Evoboost: +1~5 Move Gauge Refill, +2 All Stats (bar Accuracy and Evasiveness) All
- Role: Bulky Mixed Multi Support
- Recommended Lucky Skill: Defense Crush 2 / Fighting Guard
- Weakness: Sync Move Contestant against Mega Strike Sync Pairs
Leaf’s Eevee is one of the most interesting Support Sync Pairs to be released, as it is, as of writing time, one of the only two Sync Pairs with a non damaging Sync Move. As a trade-off, Eevee’s Sync Move buffs the whole team’s visible stats by 2 stages. It is best used in dedicated Co-Op teams to quickly stack the boosts to the maximum. She also works well as a team filler in Battle Villa thanks to her 1 Bar Move, Tackle, which helps immensely with Sync Move grinding.
MC & Pikachu
MC & Torchic
- 2 Use +2 Attack All
- 2 Use +1 Critical Hit Rate All and +2 Special Attack All
- Role: Regular Mixed Stat Support
- Recommended Lucky Skill: Water Guard
- Weakness: Inefficient Physical Boosting
A free Sync Pair that can be used regardless of which blade the player intends to attack from. As the offensive counterpart to Liza’s Lunatone, Torchic is likewise extremely important for Strike Sync Pairs that cannot effectively raise or maximize its offenses.
Roxanne & Nosepass – Probopass
- 2 Use +2 Defense All
- 2 Use +2 Special Attack All and Speed All
- 1 Use Wide Guard (1 Move Gauge slot)
- Role: Regular Special Stat Support
- Recommended Lucky Skill: Stoic 2 / Vigilance / Fighting Guard
- Weakness: Incompatibility with Physical Strike cores
Roxanne is the best budget Support Sync Pair available, offering a nice balanced set of boosts that favor any Special Strike core. Her Probopass’ trademark skill is Wide Guard, which blocks a non Sync opposing AOE move once, and by extension preserving the team’s Unity bonus in Co-Op.
C Borderline (F2P Strike)
Noland & Pinsir (M)
Noland and Korrina are rated extremely highly despite having better Gacha alternatives in their respective Types (in this case, Lusamine). This is because they are highly efficient on their own as stand-ins, which makes their improved counterparts less of a necessity. Noland can even be obtained as early as Chapter 2 as one of the 5 free 4 Star Strike Sync Pair option. Thanks to Fury Cutter, Pinsir can deal massive damage at the cost of only 1 Move Gauge slot. However, the more Pinsir moves, the more damage it takes from passive damage. |
Hau & Raichu
Hau and Alolan Raichu used to be the premier Strike option for F2P teams, due to the low difficulty levels of what is now the exploratory phase in Pokemon Masters. As the game expanded, better options, some free, were made available and that cut into Alolan Raichu’s popularity harshly. |
Pryce & Dewgong
The release of Steven’s Summer Skin has seen the newcomer usurp Pryce’s role as the game’s best Ice Type Strike Sync Pair. His Sync Grid is an attempt to turn his Dewgong into a Hail variant of Cynthia’s Garchomp. Yet, he is still a capable stand-in, particularly as his competition is only available on a seasonal basis. |
Barry & Piplup – Prinplup – Empoleon |
C/D
*** This sections houses Sync Pairs that are in between the C and D Tiers. ***
| Dawn (Palentines 2021) & Alcremie | Lillie (New Year’s 2021) & Ribombee |
| Lusamine & Pheromosa |
D Tier
*** This Tier houses cheaper alternatives and Sync Pairs with operational niches. ***
D+ Strike
Silver & Ho-Oh
Sets up Sun with Sync
Gladion & Silvally
Any Type Striker
Koga & Crobat
Bruno & Machamp
D- Strike
Lorelei & Lapras
Hail Based Striker
Clair & Kingdra
Best Free Dragon Type Strike (when used alongside May & Swampert)
Lucy & Seviper
Gardenia & Roserade
Only viable substitute to Brendan & Sceptile
D Support
Misty & Starmie
Erika & Vileplume
Liza & Lunatone
Winona & Pelipper
- 2 Use Rain Dance (2 Move Gauge slots)
- 2 Use +2 Defense and Speed
- Racing Rain 2
- Sync Tech: Power increases when the target is flinching
- Role: Rain Tech
- Recommended Lucky Skill: Troublemaker 1 / Hit and Run 2
- Weakness: Poor Default Offenses
Winona and Pelipper may be poor damage dealers, but the Rain that it sets up through Rain Dance is pivotal at maximizing the damage output on Water Type Strike units, as well as enabling other Sync Pairs that have Racing Rain 2 as their Passive Skills. Pelipper, unfortunately, doesn’t benefit from Rain outside of Move Gauge acceleration, which decreases its utility when compared to other Weather setters such as Swampert, Meganium, Ho-Oh, or Alolan Sandslash.
D BorderLine
Will & Xatu
- 2 Use 2x Copy Target’s Stat Boosts
- Stored Power
- Role: Special Tech
- Recommended Lucky Skill: Hit and Run 2 / Stoic 2 / Critical Strike 2
- Weakness: Heavy Reliance on Team Support
Will’s Stored Power may be a gimmick, but it is a scarily powerful one. Once the player has loaded Xatu with the buffs, they can start wreaking havoc. This does mean that Xatu becomes a one-off per day unit in the Battle Villa unless players make good use of Move Point recovery.
Drake & Salamence
- 2 Use +2 Special Defense All
- 2 Use +2 Defense and Move Gauge Refill All
- Terrify 1
- Role: Pure Defensive Gauge Support
- Recommended Lucky Skill: Vigilance / Fairy Guard
- Weakness: No Offensive Boosts
Drake and Salamence rose to popularity after the Sync Move Update, which meant that his set is no longer completely nullified by opposing Sync Moves. It is notable for being the only purely defensive Support unit. While he is extremely valuable in the Battle Villa due to his powerful Move Gauge Refill support in the singles format, his set loses a lot of steam in Co-Op battles.
Brawly & Makuhita – Hariyama
Brick Break and Potion
Norman & Slaking
Tate & Solrock
Honorable Mentions
*** This tier houses Sync Pairs whose individual sets would see them place higher, but are unfortunately penalized due to role congestion and other reasons.***
Lance (New Year’s 2021) & Gyarados
Ethan & Typhlosion
Decent Fire Type Strike Sync Pair with a nice niche. However, there are simply way too many Fire Type competitors ahead of it, like Sygna Suit Red, Hilda, and even Flannery.
Zinnia & Rayquaza
- 2 Use Confusion, Flinch, Trap Removal, +2 Attack and Special Attack | (-2 Defense and Special Defense)
- Weather Surge 3
- Role: Mixed Single Target Nuke
- Recommended Lucky Skill: Clearheaded / Dauntless
- Weakness: Pick a Blade
- Weakness: Event Locked
Zinnia and Rayquaza see Lucky Skills as their savior since it helps mitigate the drawbacks from either Outrage or Draco Meteor, though not simultaneously. Building a team around her has also become rather straightforward, which is great for this Sync Pair.
Note: Zinnia is only available during her Story Event. Players who miss out on her in her event window will probably need to wait for quite a while before there is a second repeat.
Volkner & Luxray

ur website is pretty cool, from Brazil here, thanks
LikeLike
Very detailed!! Love your work!
LikeLike
is dawn really an honorable mention? her attack siphon, defense buff, and full heal (literally) synergize so well to make such a powerful physical tank! shouldn’t she be at least B Rank? just an opinion, but she’s DEFINITELY a more beneficial sync pair to have in battles than Machamp or Hariyama.
LikeLike